
What is a Mouse DPI? The Definitive Guide to Sensor Resolution
Understanding exactly what is a mouse DPI sits at the very foundation of modern PC hardware optimization. The gaming peripheral market is currently flooded with marketing buzzwords and fake specs. If you want to aim better or work faster, you have to master the underlying tech.
Dots Per Inch (DPI) remains the single most important metric that governs how your hand communicates with your computer. It defines the raw relationship between your physical hand movement and the digital cursor on your screen. Failing to understand this metric is the dividing line between a surgically precise setup and a severely bottlenecked workflow.
A higher DPI setting simply makes the input device more sensitive. It forces the on-screen cursor to cover massive digital distances with microscopic physical adjustments.
What Does DPI on a Mouse Mean? Real-World Impact on Aim
The immediate impact of DPI on PC gaming and daily use cannot be overstated. A sluggish cursor destroys your productivity. A hyper-sensitive cursor destroys your accuracy.
Let’s look at early competitive LAN environments. Players using a legacy 400 DPI setting often experienced extreme biomechanical fatigue. They were essentially dragging an anchor through mud just to move across a modern high-resolution display.
Transitioning that exact hardware profile to a 1600 DPI baseline unlocks an entirely different dimension of micro-correction. The physical drag vanishes, and on-screen tracking becomes fluid. Comprehending what does dpi means for a mouse is not optional for power users—it is a strict requirement for peak responsiveness.
What is a Mouse DPI: Core Engineering & Meaning
To grasp the reality of what DPI means for your mouse, we have to ignore the consumer packaging and examine the bare silicon.
While the entire industry universally uses the term DPI (Dots Per Inch), the technically accurate engineering term is actually CPI (Counts Per Inch). Printers use dots. Digital sensors use counts.
When a spec sheet claims a device operates at 800 DPI, it technically means the internal optical chip registers 800 discrete coordinate “counts” for every single inch of physical tracking surface it crosses.
How Your Mouse Sensor Actually “Sees” Movement
The architecture inside a flagship gaming mouse is basically an ultra-high-speed digital camera mounted above a specialized light. The sensor does not measure physical distance mechanically. It measures distance by analyzing thousands of high-speed images per second.
Every fraction of a millisecond, the internal CMOS (Complementary Metal-Oxide-Semiconductor) array captures a microscopic photo of your mouse pad. The embedded Digital Signal Processor (DSP) then compares these microscopic surface variations.
In optical engineering, this is known as the speckle pattern. By comparing the current frame to the previous frame, it calculates the exact delta of your X and Y movement.
This calculated delta answers the question of what does dpi do for mouse hardware. It is the literal hardware-level sensitivity multiplier dictating how many tracking signals are generated from a single hand translation.
How to Know Mouse DPI: Native vs. Interpolated Resolution
What does dpi mean for a mouse in a practical, electrical sense? It acts as the primary translator between analog physical reality and digital coordinate input.
A mouse operating at a native DPI maps these raw CMOS counts directly to your PC without any complex mathematical guesswork. However, there is a massive engineering distinction between a sensor’s true native resolution and a firmware-interpolated software resolution.
When a high-end sensor operates natively, the CMOS pixel grid is strictly 1:1 with the output data sent over the USB cable.
If the hardware is artificially pushed beyond its physical limit, the internal Microcontroller Unit (MCU) must intervene. Interpolation forces the MCU to artificially scale the raw coordinate data. It is essentially guessing the missing tracking points between actual physical frames.
Expert Take: This estimation process is exactly why ultra-high DPI feels awful. It introduces severe signal noise, rounding errors, and unnecessary processing overhead.
The True Cost of Fake DPI Numbers
| Metric | Native DPI (e.g., 1600) | Interpolated DPI (e.g., 26,000) |
| Data Generation | 1:1 Hardware CMOS mapping | MCU mathematical scaling/guessing |
| Tracking Fidelity | Flawless, linear coordinate tracking | Shaky, prone to algorithmic noise |
| Jitter Profile | Virtually nonexistent | High-frequency surface vibration |
| Latency Impact | Base hardware latency (0ms added) | Adds measurable microsecond delays |
Extensive diagnostic bench testing confirms that staying within a sensor’s native bounds yields noticeably cleaner tracking paths.
Interpolated configurations result in sensor jitter, where your cursor rapidly vibrates simply because the firmware is generating phantom coordinate counts. If you are wondering what is dpi for a mouse, it is the threshold between raw precision and algorithmic noise.
How to Check DPI of Mouse: Diagnostics & Testing
The physical mechanism of tracking relies entirely on the integrated illumination source. Optical sensors dominate the flagship market today, utilizing an infrared LED to illuminate the surface.
Older laser sensors utilized a VCSEL (Vertical-Cavity Surface-Emitting Laser). While laser sensors were heavily marketed as superior because they could track on glass, their extreme localized precision was actually their greatest mechanical flaw.
Laser illumination penetrates much deeper into the tracking surface. On standard cloth mousepads, the laser picks up microscopic imperfections, fabric fibers, and dust particles. This deep penetration causes highly erratic cursor behavior and unwanted acceleration during high-speed flicks.
The Era of Flawless Optical Sensors
Modern flagship optical sensors, like the highly efficient PixArt PAW3395, have perfected the LED illumination model.
The PAW3395 features an 850nm infrared illumination source capable of tracking at an astonishing 650 IPS (Inches Per Second) with a maximum acceleration tolerance of 50g. These optical configurations provide absolute 1:1 tracking without the depth-penetration noise associated with legacy laser diodes.
The DSP dynamically evaluates image quality via parameters stored in internal memory registers, ensuring only high-fidelity speckle patterns are converted into usable coordinate data.
🔬 Scientific Insight: Optical sensors use real-time optical flow algorithms to track dynamic surface speckle patterns. The efficacy of this measurement depends on the real-time image quality parameter (SQUAL). Paired with a uniform cloth pad, a high-end sensor maximizes frame rate stability, achieving a physical resolution error of less than 0.4% at speeds up to 200 IPS.
DPI vs. Software Sensitivity vs. eDPI: Clearing the Confusion
A fundamental misunderstanding completely plagues the gaming market: the continuous conflation of hardware DPI and software sensitivity. These are entirely distinct operational layers.
Determining what is my mouse dpi requires separating the hardware from the software. DPI represents the strict, unalterable hardware capability of the CMOS sensor. Software sensitivity is an arbitrary mathematical multiplier applied later by your OS or game engine.
If an optical sensor outputs exactly 800 physical counts, but your game applies a sensitivity multiplier of 2.0, your cursor behaves exactly as if it received 1600 total counts.
The hardware does not know the game exists, and the game does not know the hardware limits. Relying solely on a high DPI or in-game sensitivity setting is a flawed approach to optimization.
eDPI: The True Standard for Gamers
To normalize this chaos across thousands of different hardware setups, the esports industry standardized the Effective DPI (eDPI) metric.
eDPI mathematically isolates the true physical feel of your setup by combining both layers into a single comparable variable.
The Formula:
$$eDPI = Mouse DPI \times In-Game Sensitivity$$
- Player A: Uses 800 DPI with a 0.5 in-game sensitivity (Final eDPI = 400).
- Player B: Uses 400 DPI with a 1.0 in-game sensitivity (Final eDPI = 400).
Both players require the exact same physical hand movement distance to execute a full 360-degree rotation in-game. This completely standardizes the mechanical aiming experience.
Professional telemetry indicates that tactical FPS games like Valorant heavily favor an eDPI hovering around 800. Arena shooters with high verticality push optimal eDPI averages much closer to the 3200 mark. Identifying a good dpi for fps starts with your eDPI baseline.
How to Find Your Mouse DPI: Diagnostics & Identification
Without built-in OLED screens, identifying your active sensitivity state requires specific diagnostic workflows. Standard OEM devices default to manufacturer-defined tiered polling states right out of the box.
Software Methods: How to Check DPI of a Mouse
The most definitive method for checking the DPI of your mouse is communicating directly with the device through proprietary software like Logitech G-Hub, Razer Synapse, or Corsair iCUE. These apps read the exact hexadecimal values stored in the onboard memory registers.
However, Windows OS-level settings can completely ruin your true hardware tracking. The Windows pointer speed slider behaves like an invisible software scaler, frequently corrupting raw input data.
The Critical 6/11 Rule
The OS pointer speed slider MUST be left exactly at the 6/11 position (the absolute middle notch).
- True 1:1 Mapping: At the 6/11 notch, Windows applies a strict 1.0x multiplier. One hardware count sent equals exactly one pixel of movement.
- Avoiding Corrupted Data: If the slider is pushed to 7/11, Windows instantly applies a 1.5x multiplier, skipping pixels and utterly destroying hardware tracking.
How to Test Mouse DPI: The Ruler Method
When software is unavailable, or when verifying a budget sensor, the manual ruler method bypasses all software obfuscation. This physical test exposes “DPI deviation” a highly common manufacturing flaw.
Diagnostic bench testing often reveals that a mouse set to 800 DPI in the software may actually output 835 DPI in practice due to lens magnification errors.
Step-by-Step Testing Protocol:
- Disable OS mouse acceleration and verify Windows pointer speed is at 6/11.
- Open a web tool like the Mousensitivity DPI Analyzer.
- Place a physical ruler flush against the side of the mouse chassis.
- Click and hold the origin point, and steadily move the mouse exactly 10 inches along the ruler.
- Divide the total pixel distance tracked by 10 to calculate the per-inch average.
The resulting figure is the true, physical CPI output of the hardware. If a significant deviation is detected, your eDPI formula must be adjusted.
Quick Color Codes for Gaming Mice
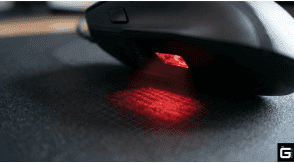
For instant field testing without a ruler, check the LED flash when you press your dpi button on your gaming mouse. The industry standard color mapping is usually:
- Red: 400 DPI
- Blue/Green: 800 DPI
- Yellow: 1600 DPI
- Purple: 3200 DPI
How to Adjust DPI on Mouse: Configuration & Settings
Altering the sensitivity involves interacting with the MCU’s memory architectures. But a severe software engineering flaw continuously plagues many modern mice: onboard memory desynchronization.
When you alter a DPI step using bloated software suites, the profile is often executed at the software layer rather than being securely flashed to the mouse’s internal memory (EEPROM).
The Reverting Bug: If the background peripheral software crashes, the mouse instantly reverts back to its factory default DPI state. To fix this, always use “Onboard Memory Modes” to permanently hardcode the DPI steps directly into the silicon.
Configuring Windows Pointer Speed (Disable Acceleration)
Elite hardware-level precision is useless if your OS corrupts the data stream. “Enhanced pointer precision” is a legacy dynamic acceleration curve permanently built into Windows.
When enabled, the OS dynamically adjusts the sensitivity multiplier in real time based solely on the velocity of your hand. Moving the mouse three inches slowly results in a different on-screen distance than moving it three inches extremely quickly.
This volatile output curve completely destroys your central nervous system’s ability to build reliable muscle memory.
- Open the Windows Control Panel and navigate to Mouse Properties.
- Select the Pointer Options tab.
- Lock the primary motion slider strictly on the 6th notch.
- Explicitly uncheck the “enhance pointer precision” box.
The 20,000 DPI Myth: Do You Really Need High DPI?
The peripheral market is aggressively pushing a meaningless numbers game. Flagship sensors boasting 26,000 or even 44,000 DPI are mathematical absurdities for human motor control.
The human hand simply cannot successfully control an input device running at 30,000 DPI without the digital cursor violently shaking from a resting pulse.
The Truth About Firmware Smoothing
High-end CMOS arrays natively cap out around 16,000 CPI. When a mouse advertises 26,000 DPI, the firmware is almost always engaging in extreme mathematical interpolation.
Operating at these extreme limits causes the sensor to pick up the microscopic weave of the cloth mousepad, misinterpreting the fabric texture as physical movement. This highly destructive phenomenon is technically known as sensor ripple.
To mask this severe jitter, engineers force Ripple Control or aggressive Smoothing algorithms into the data pipeline.
| Sensor Setting | MCU Processing Method | Introduced Latency | Final Output Quality |
| 800 – 1600 DPI (Optimal) | Pure Native CMOS Readout | 0.0ms | Flawless, raw data |
| > 1900 DPI | Light Smoothing Filter Applied | ~0.5ms | Slight low-pass filtering |
| > 16,000 DPI (Marketing) | Extreme Interpolation + Smoothing | 1.0ms – 3.0ms | Highly filtered, artificial delay |
Smoothing algorithms intentionally hold back incoming data packets, average their chaotic trajectories in the buffer, and then release a “corrected” straight path. This mathematical averaging inherently adds 1 to 3 milliseconds of deterministic input delay. Chasing a 26,000 DPI specification directly degrades your motion-to-photon latency.
How Your Monitor Resolution Affects Mouse DPI
While running at 26,000 DPI is useless, clinging to the archaic 400 DPI standard is equally flawed. As monitor pixel density exponentially increases, sensor resolution must scale proportionally to prevent data starvation.
If you run an outdated 400 DPI profile on a modern 4K monitor and artificially raise your in-game software sensitivity to compensate, you will immediately experience pixel skipping.
The sensor simply does not generate enough physical counts to individually address every single pixel on the screen. This forces your crosshair to literally jump over target hitboxes during long-range adjustments.
The Minimum “DPI Floor” Rule:
- 1080p Monitors: 400 – 800 DPI minimum for standard 1:1 mapping.
- 1440p Monitors: 800 – 1200 DPI minimum to maintain micro-adjustment granularity.
- 4K Monitors: 1600 – 2400 DPI minimum to absolutely prevent coordinate rounding errors.
Finding a Good DPI for FPS: Gaming Optimization
In the realm of elite esports, aiming is an exercise in human biomechanics. Based on deep technical analysis of modern sensor behavior, the new definitive standard for competitive gaming is 1600 DPI.
This specific numerical value represents the absolute hardware “Goldilocks zone.” It comfortably clears the DPI Floor for 1440p and 4K monitors, thoroughly preventing any risk of pixel skipping.
Simultaneously, 1600 DPI is low enough to remain well within the native capabilities of modern sensors, completely avoiding the latency penalties of extreme firmware smoothing.
Productivity and Ergonomics
For standard desktop navigation and creative workloads, exceeding 3200 DPI makes double-clicking small UI elements nearly impossible.
Conversely, navigating dual monitors at a low 400 DPI induces severe wrist fatigue. The scientifically sound compromise for intense productivity falls strictly within the 800 to 1200 DPI range, mitigating the risk of Repetitive Strain Injuries (RSI).
A Step-by-Step Guide to Transitioning
Resetting heavily embedded muscle memory takes time.
- Calculate Baseline: Determine your current active eDPI.
- Lock Hardware: Hardcode your physical mouse to exactly 1600 DPI.
- Normalize Software: Divide your original eDPI by 1600 to find your new exact in-game multiplier.
- Isolate Training: Utilize aim trainers (KovaaK’s/Aim Lab) for 30 minutes daily to map the new coefficients to your muscle memory.
🔬 Scientific Insight: According to the academic principles of Fitts’ Law, human targeting movement follows a strict speed-accuracy tradeoff. Optimal interaction occurs when hardware sensitivity scales proportionally with the target distance, maximizing throughput without forcing you out of your biomechanical comfort zone.
How to Change DPI on Mouse: Practical Steps
If your cursor is moving too fast or too slow, you need to know how to change dpi on the mouse settings directly. Never use the Windows pointer speed slider to do this. You have two primary ways to change it:
1. Using the Dedicated DPI Button
Almost every modern gaming mouse features a physical DPI button on the gaming mouse chassis. It is usually located right behind the scroll wheel, or sometimes underneath the mouse near the sensor.
- Pressing this button cycles through factory-set DPI profiles.
- Quick Check: Look at your mouse’s LED lights to see how to instantly know its dpi.
2. Using Manufacturer Software
To explicitly change dpi on the mouse to a custom number (like 1600), you must use the official software.
- Download your brand’s engine (Logitech G-Hub, Razer Synapse, Corsair iCUE, etc.).
- Navigate to the “Performance” or “Sensitivity” tab.
- Drag the DPI slider to exactly 1600.
- Pro Tip: Save this profile to your mouse’s “Onboard Memory” so the setting stays permanently.
Beyond DPI: Mouse Polling Rate Optimization
The singular focus on what DPI does often overshadows the broader input pipeline. A massively high sensor resolution means nothing if the host system cannot process the incoming data efficiently.
Hardware DPI dictates how much data is generated. Polling rate dictates exactly how fast that data is delivered to the CPU.
Standard gaming peripherals historically poll at 1000Hz (1.0ms delay). Modern enthusiast-grade hardware pushes to 4000Hz or 8000Hz, collapsing the delivery window to a blistering 0.125 milliseconds.
Why 400 DPI Ruins 8K Polling
These two metrics are inextricably linked. An 8000Hz polling rate is entirely useless if the hardware DPI is set too low.
If a flagship mouse is stubbornly set to 400 DPI, you must physically move the device at a highly aggressive 20 IPS just to generate enough physical counts to fill the 8000Hz pipeline. During slow, surgical micro-adjustments, a 400 DPI mouse literally starves the USB bus of data. It forces your expensive 8K mouse to behave exactly like a basic 1K mouse.
To actually saturate an 8000Hz USB polling rate, the hardware DPI must be raised to 1600 or 3200. This high data density ensures that even a microscopic fingertip movement generates a fresh coordinate count every 0.125ms.
🔬 Scientific Insight: Advanced sensors use ‘Motion Sync’ to align CMOS frame captures with USB polling events. At a 1000Hz polling rate, this introduces a noticeable algorithmic delay of ~0.5ms. By fully saturating an 8000Hz polling rate via a 1600+ DPI, you shrink the interval to 0.125ms, mathematically mitigating the Motion Sync latency penalty to a negligible ~0.06ms.
The Final Verdict
The engineering reality behind what is a mouse dpi reveals that bigger numbers do not equal better aim. The marketing pursuit of 30,000+ DPI has created hardware plagued by interpolation noise, firmware smoothing, and unnecessary input latency.
Absolute precision is achieved entirely through engineering balance. By firmly locking your hardware into the 1600 DPI sweet spot, you instantly eliminate pixel skipping, bypass smoothing latency, and perfectly saturate next-generation 8000Hz polling architectures.
The legacy era of 400 DPI is dead, suffocated by the pixel density of modern monitors. The heavily advertised era of 30,000 DPI is an absolute marketing fabrication. True system optimization begins precisely when the marketing hype ends.