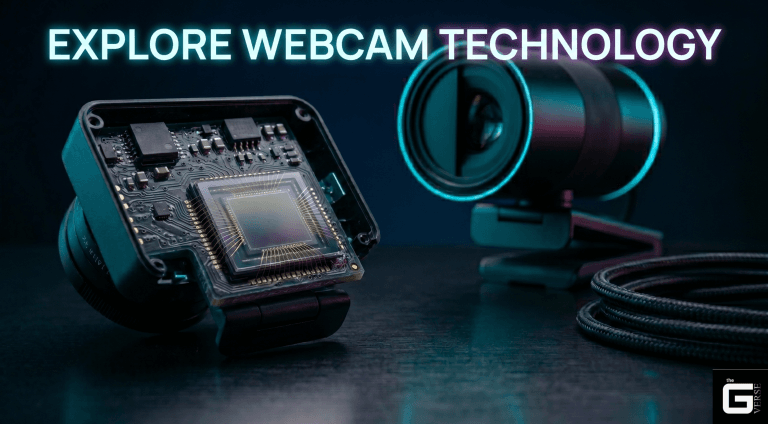
How Webcam Works in Computer Architecture? The Complete Breakdown
A webcam captures light through its lens, converts that light into a digital image using an internal sensor, and sends the finished image to your computer over a USB cable. Software on your computer like Zoom, your browser, Windows Camera — then displays or processes it.
That explanation covers the basics, but it skips the part that actually matters if your webcam is lagging, looking grainy in low light, or glitching out during a call. Most of that comes down to what’s happening inside the sensor itself and how the data travels from that sensor to your operating system. Here’s the full path, end to end.
Quick Answer
A webcam focuses incoming light through a multi-element lens onto a CMOS sensor, which converts photons into electrical charges. An analog-to-digital converter (ADC) turns those charges into raw binary data, and an onboard Image Signal Processor (ISP) sharpens, color-corrects, and compresses the result. A USB bridge controller then streams the compressed video over USB using the standard UVC (USB Video Class) protocol, which your operating system reads without needing a custom driver.
How a Webcam Actually Works, Step by Step
The full mechanism breaks down into four stages: optical capture, sensor-level digitization, onboard image processing, and transmission to your computer over USB.
At the sensor level, most modern webcams have moved from older Front-Side Illuminated (FSI) CMOS sensors to Back-Side Illuminated (BSI) designs.
FSI sensors place the metal wiring layer directly above the light-sensitive photodiodes, so incoming light has to pass through a layer of transistors and wiring before it reaches the sensor. That scatters and blocks some of the light, which hurts low-light performance.
BSI sensors flip that layout. The wiring sits behind the photodiode layer instead of in front of it, so light hits the sensor almost unobstructed. This pushes the fill factor (the percentage of each pixel that can actually collect light) close to 100%, which is a big part of why modern webcams handle dim rooms noticeably better than older ones.
If privacy is a concern, look for a webcam with a physical, mechanical shutter that physically blocks the lens. That’s the one webcam security feature no software exploit can bypass, since it’s a physical barrier rather than a setting.
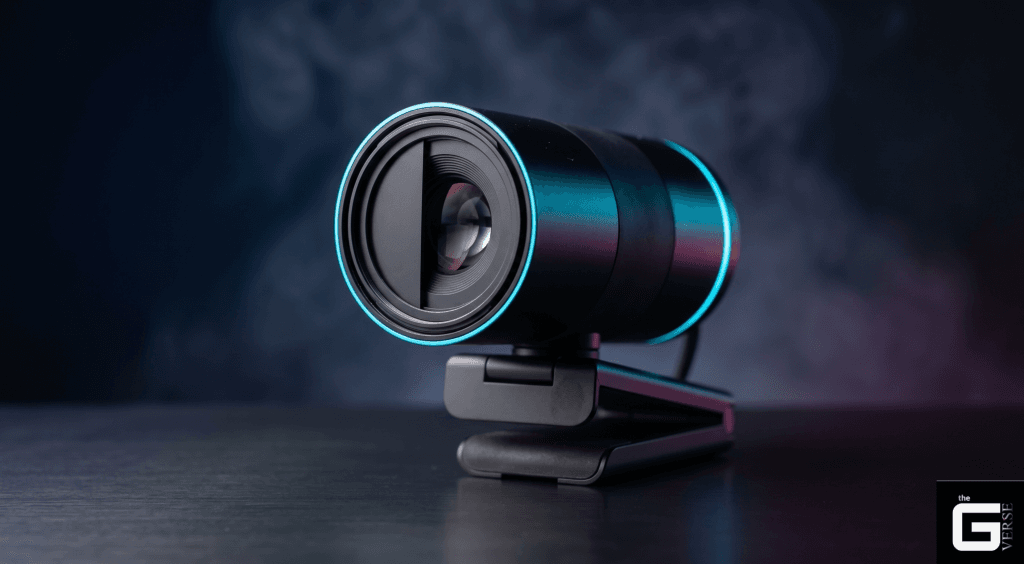
The Lens: Where Light Gets Focused
The lens assembly is what determines image sharpness and how well the camera handles different lighting. Most webcam lenses use 5 or 6 plastic or glass elements stacked inside a small barrel. These elements bend the light coming from your face and the room around you into a focused beam that lands precisely on the sensor.
Better lens designs push quantum efficiency (how much of the incoming light actually gets converted to signal) toward 70%, and BSI sensor designs can push it past 90%. Most webcams use a fixed-focus lens tuned to stay sharp across a typical desk distance, though some higher-end models use a small voice coil motor (VCM) to physically shift the lens for autofocus. The lens aperture also matters here — a wider aperture (lower f-number) lets in more light before any digital boosting happens.
For readers who want the underlying math: lens focus follows the standard thin lens equation, 1/f = 1/d₀ + 1/dᵢ, where f is the focal length, d₀ is the distance to you, and dᵢ is the distance from the lens to the sensor. In a webcam’s small housing, that distance has to stay precise down to micrometers, or heat from extended use can shift focus slightly.
The Sensor: Turning Light Into Electricity
Once light reaches the CMOS sensor, it hits an array of millions of individual photodiodes, each covered by a red, green, or blue filter (together called the Bayer filter pattern). When a photon strikes a photodiode, it knocks an electron loose, and that buildup of electrons is what becomes your image data.
The amount of charge each pixel builds up depends on how much light hit it and for how long. Unlike older CCD sensors, which moved charge across the whole chip to one shared output, modern CMOS sensors convert charge to voltage right at each pixel. That’s a big reason webcams today can shoot high frame rates without drawing much power.
What’s happening inside a single pixel:
| Transistor Component | Operational Tag | Primary Hardware Functionality |
| Photodiode | Node | Collects light carrier hole pairs generated by incoming photons. |
| Transfer Gate | TX | Controls the transfer of accumulated charge from the photodiode to the Floating Diffusion node. |
| Reset Transistor | RST | Resets the Floating Diffusion node to a reference voltage level before charge transfer occurs. |
| Source-Follower Amplifier | SF | Buffers and converts the charge on the Floating Diffusion node to an analog voltage signal. |
| Row-Select Transistor | SEL | Connects the source-follower amplifier’s output directly to the column readout bus during access. |

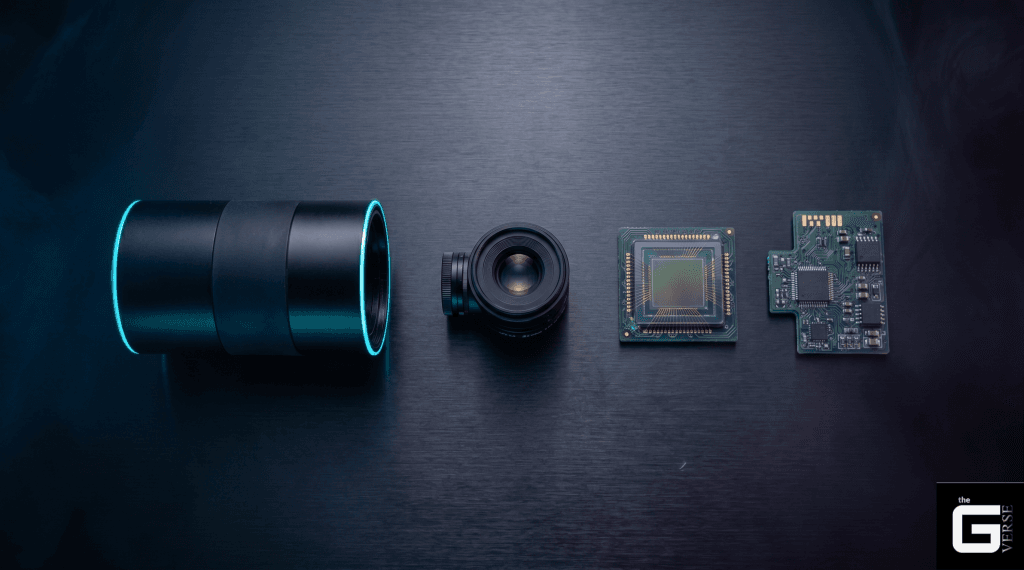
What’s Inside a Webcam
A webcam isn’t just a sensor in a plastic shell — it’s a small dedicated computer built to handle real-time video. Almost all of the heavy processing (image tuning, compression) happens inside the webcam itself, before any data reaches your PC’s CPU. That’s why a 1080p60 webcam typically uses only around 2% of your CPU during a call — the webcam’s own chip is doing the hard work, not your processor.
A typical internal layout looks like this:
- Lens assembly — focuses light onto the sensor
- CMOS image sensor (e.g., Onsemi AR0235) — converts light into raw voltage signals
- Analog-to-digital converter (ADC) — turns those voltages into digital values
- Image signal processor (ISP) (e.g., Onsemi AP1302) — handles color correction, sharpening, and noise reduction
- USB bridge chip — packages the finished video into USB data and handles the UVC handshake with your computer
Cleaning Up the Image: Noise and Vignetting Correction
Raw sensor data isn’t ready to use straight off the ADC — it carries some built-in noise that needs correcting first.
Even in total darkness, sensors pick up a small amount of “dark current” from heat inside the chip, which makes pixels register a faint signal that isn’t real. To fix this, the ISP uses a strip of shielded pixels around the sensor’s edge (called optical black pixels) to measure that baseline noise, then subtracts it from every pixel in the frame.
The ISP also corrects for vignetting — the natural darkening you get at the corners of a lens, since light hits the edges of the sensor at a steeper angle than it hits the center. The ISP applies stronger brightness correction toward the edges of the frame to even this out.
For readers curious about the underlying formulas: dark signal subtraction is calculated by averaging the shielded optical black pixels and subtracting that average from every pixel in the frame. Lens shading correction uses a radial gain curve based on each pixel’s distance from the optical center, applying progressively stronger correction the farther a pixel sits from the middle of the frame.
Rebuilding Color: Demosaicing
Since each pixel only captures one color (red, green, or blue), the sensor’s raw output is a checkerboard-style grid rather than a full color image. About half the pixels are green, since green carries most of the brightness information our eyes are sensitive to, and the rest are split between red and blue.
The ISP has to calculate the two missing color values at every single pixel through a process called demosaicing, essentially estimating each missing color based on the values of nearby pixels. Once every pixel has a full RGB value, the ISP applies a color correction matrix to map the sensor’s raw colors onto a standard color space like sRGB.
Simple demosaicing averages the values of the four nearest neighboring pixels of the same color. Better ISPs use edge-aware versions of this instead, checking which direction (horizontal or vertical) has less contrast and interpolating along that direction, which keeps edges in the image looking sharp instead of blurry.
How a Webcam Sends Data to Your Computer
Once the ISP has finished processing a frame, that data has to travel across a physical connection to your computer.
| Metric / Parameter | Legacy USB 2.0 | Modern USB 3.0 / 3.2 Gen 1 | Internal MIPI CSI-2 |
| Raw Bandwidth | 480 Mbps (Half-Duplex) | 5.0 Gbps (Full-Duplex) | Up to 10 Gbps (4-Lane Config) |
| Max Power Delivery | 500 mA @ 5V (2.5W) | 900 mA @ 5V (4.5W) | System rail direct |
| Raw Video Capability | Cannot support uncompressed 1080p60 | Easily supports uncompressed 1080p60 / 4K30 | Supports uncompressed, low latency raw streams |
| On-Chip Compression | Required (lossy MJPEG / H.264) | Optional (allows raw YUY2 / NV12) | None (raw sensor data is piped directly to CPU) |
If you plug a webcam into a crowded USB hub or a cheap dock, you might notice dropped frames or sudden flashes in the image — that’s usually a power or bandwidth issue at the hub level, not the webcam itself.
USB 2.0 tops out around 35 MB/s of real-world throughput, which isn’t enough for raw uncompressed video. That’s why older webcams compress everything to JPEG on-device before sending it, which adds a small amount of processing delay and visible compression artifacts. USB 3.0 has enough bandwidth to send raw, uncompressed color data without that extra compression step.
The UVC Handshake: How Your Computer Recognizes a Webcam
When you plug in a USB webcam, it identifies itself to your operating system automatically, without needing a custom driver. This works through the USB Video Class (UVC) standard, in a few steps:
- Enumeration — Your computer asks the webcam what it is. The webcam responds with its device descriptor, identifying itself as a video device and exposing both a control interface (for settings) and a streaming interface (for video data).
- Probing — Your computer asks what resolutions and frame rates the webcam supports, and the webcam replies with its capabilities and bandwidth requirements.
- Commit — Once both sides agree on a format (say, 1080p at 30fps), that setting gets locked in.
- Interface activation — The specific data channel needed for that video stream gets reserved on the USB connection.
- Streaming begins — The webcam starts sending video data in USB packets, each one tagged with a timestamp so frames arrive in the right order.
How Windows Recognizes a Webcam
Windows handles all of this through a built-in driver called usbvideo.sys — you never need to install anything separately for a standard UVC webcam. Here’s what happens the moment you plug one in:
| Phase | System Trigger Event | Kernel-Mode Action & Windows PnP Pipeline |
| 01 | Hardware Connection | Physical insertion of the webcam into the port triggers a hardware signal voltage pull-up on the USB data lines. |
| 02 | Signal Detection | The physical USB controller detects this change and immediately alerts the Windows OS kernel subsystem. |
| 03 | Hardware Query | Windows queries the connected peripheral, reading the device’s explicit hardware ID descriptor properties. |
| 04 | Class Driver Matching | The PnP engine matches the reported device class code to its native video device driver class specifications. |
| 05 | Driver Hooking | The built-in, kernel-mode usbvideo.sys driver instance takes exclusive control over the physical connection interface. |
| 06 | Symbolic Link Creation | Windows registers and creates a symbolic interface link for the camera under its specific video device category. |
| 07 | User-Mode Authorization | Downstream application media hooks (like Zoom, Teams, or Camera apps) can now securely access the uncompressed video feed. |
A Common Glitch: Audio Service Crashes
One known issue: if a webcam has a built-in microphone and gets unplugged and replugged quickly while an app like Zoom or Teams still has it open, Windows’ audio service can get stuck trying to shut down the connection cleanly. This can knock out your system audio entirely until you restart the audio service.
If this happens, you can fix it without rebooting by running these commands in an elevated PowerShell window:
Stop-Service -Name “audiosrv” -Force
Stop-Service -Name “AudioEndpointBuilder” -Force
Start-Service -Name “AudioEndpointBuilder”
Start-Service -Name “audiosrv”
Do Webcams Have Microphones?
Most webcams include a microphone, and better ones use two microphones together rather than one.
A single microphone picks up sound from every direction equally, which means it captures your voice along with keyboard clicks, fan noise, and room echo all at once. To cut down on that, many webcams use a pair of microphones spaced apart and combine their signals through a process called beamforming.
Because you’re sitting directly in front of the camera, sound from your voice reaches both microphones at almost exactly the same time, so the two signals combine and reinforce each other. Sound coming from the side of the room reaches each microphone at slightly different times, and the webcam’s processor uses that timing difference to identify it as background noise and reduce it.
This approach has a real limitation, though: sound intensity drops off sharply with distance (it falls to a quarter of its strength every time the distance doubles). That means a microphone sitting in a webcam several feet from your mouth is always working with a much weaker signal than a headset mic would get, which is why even good webcam mics rely heavily on noise reduction and gain boosting to sound usable.
The “Sped-Up Audio” Bug
A known issue on some webcam models: the audio comes out sounding fast and high-pitched, almost like a chipmunk. This happens because the webcam tells your computer it’s recording at 48,000 Hz, when the hardware is actually only capturing at 16,000 Hz. Your computer plays that audio back at the rate it was told (48kHz), which is three times faster than the actual recording, distorting the pitch.
You can usually fix this manually through Windows’ sound settings:
- Press Windows Key + R, type mmsys.cpl, and press Enter
- Go to the Recording tab and select your webcam’s microphone
- Right-click it, choose Properties, then go to the Advanced tab
- Under Default Format, select 1 channel, 16-bit, 16000 Hz
- Uncheck Allow applications to take exclusive control of this device
- Click Apply, then OK, and reconnect the webcam
How Apps Like Zoom Actually Get Your Video
Video calling apps don’t talk to your webcam hardware directly. Instead, they go through your operating system’s built-in media framework — on Windows, that’s Microsoft Media Foundation.
When you start a call, the app requests access to your webcam through this framework, which reads the raw video coming from usbvideo.sys and hands it to the app as usable video frames. Features like virtual backgrounds or auto-framing work by inserting an extra processing step into this pipeline before the video gets sent over the call.
How Facial Recognition Webcams Work (Windows Hello)
Webcams built for face-based login don’t just use a regular color sensor — they pair it with an infrared sensor to prevent someone from unlocking your PC with a photo of your face.
| Step Sequence | Active Sensor Layer | Operational Trigger & Hardware Routing |
| Step 01 | Chassis Verification | Windows confirms both the standard RGB and the near-infrared (NIR) sensors are part of the exact same physical camera container module. |
| Step 02 | Active IR Illumination | An infrared LED array lights up your face with non-visible light waves to capture baseline structural depth. |
| Step 03 | Depth & Thermal Mapping | The infrared sensor captures and maps the physical depth contours and heat signatures of your face. |
| Step 04 | RGB Color Check & Unlock | The regular color sensor captures your face at the exact same time to verify identity data against the depth profile. |
Common Webcam Myths
Myth: More megapixels always means a better image.
Image quality depends more on pixel size than pixel count. If a sensor crams 8 million pixels (4K) onto a tiny chip, each individual pixel ends up smaller and collects less light, which leads to more noise in low light. A 1080p sensor with larger individual pixels often looks noticeably cleaner in a dim room than a higher-resolution sensor squeezed onto the same size chip.
Myth: Hackers can secretly turn on your webcam without the light turning on.
On standard UVC webcams, the activity light isn’t controlled by software at all — it’s wired directly into the same power circuit as the sensor itself. If the sensor is drawing power to capture video, the light is physically on. There’s no way to power one without the other. If you want a guarantee beyond that, a webcam with a physical sliding shutter blocks the lens completely regardless of what’s happening electronically.
FAQ
What makes webcams different from regular digital cameras?
Webcams don’t have batteries, internal storage, or memory card slots. They’re built purely as real-time accessories — they draw power from your computer’s USB port and rely on your computer to store or transmit whatever they capture.
Why don’t webcams have their own storage?
Adding storage would mean adding a processor capable of managing a file system, which increases cost, power draw, and heat in a device that’s built to stay small, cheap, and cool.
Do webcams need special drivers to work?
No. Any webcam built to the UVC standard works with the driver already built into Windows, macOS, and Linux. You just plug it in.
Can two apps use the same webcam at once?
Generally no, your operating system locks the camera to one application at a time. If you need to share a feed across multiple apps, you’ll need separate software designed to mirror that video feed to other programs.
Final Takeaway
If you’re shopping for a webcam, don’t judge it by resolution alone. Image quality comes down to sensor size, pixel size, and lens aperture working together. Look for a BSI sensor at least 1/2.8″ in size with an aperture of f/2.0 or wider — that combination will outperform a higher-resolution sensor in a smaller package, especially in normal indoor lighting. And if your room is dim, adding a simple desk light will do more for your image quality than any setting inside the camera’s software.
Related Technical Read: Maximize your peripheral performance! Learn how to safely push your display panel’s hardware boundaries in our ultimate Monitor Overclocking and Refresh Rate Tuning Guide.