Mechanical Keyboard Layouts Explained: Which Size Suits You?
Choosing the right mechanical keyboard layouts is about much more than just picking the perfect switches. The physical footprint of your board dictates your typing comfort, desk organization, and posture. Before we dive deep into each specific design, you need a basic understanding of the mechanical keyboard layouts available on the market.
The Baseline: The Full-Size (100%) Keyboard
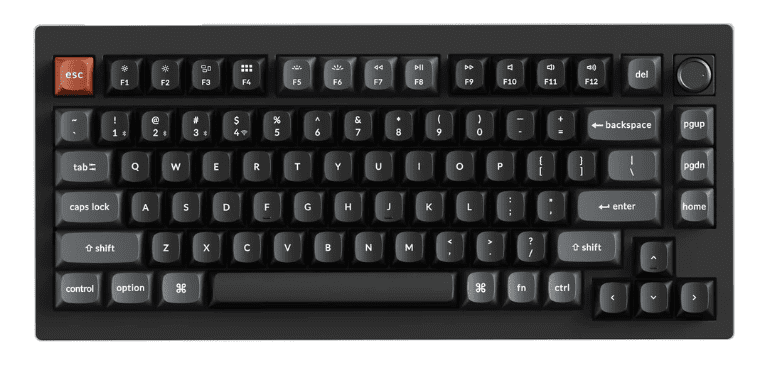
The 100% layout is the classic design found in almost every traditional office. It includes the main typing area, the F-row, navigation keys, and a dedicated number pad.
When planning your setup, a common question is: how many inches is a regular keyboard? A standard full-size keyboard typically measures between 17 and 18 inches in width. Knowing exactly how many inches is a regular keyboard helps you understand why that extra width can strain your mouse arm, and why smaller, space-saving designs were invented.
Exploring Compact Mechanical Keyboard Layouts
To combat wrist fatigue and free up desk space, experts have designed several different mechanical keyboard layouts. By strategically removing less frequently used keys, these smaller boards bring your mouse closer to your center.
Here is a quick overview of the different types of keyboard layouts based on their size (we will explore each of these in-depth in the following sections):
- 1800-Compact (96%): Keeps the number pad but squishes all the keys together to eliminate empty space.
- Tenkeyless (TKL / 80%): Simply chops off the number pad entirely. The gold standard for gamers.
- 75% & 65% Layouts: These compress the board further. A 75% keeps the F-row, while a 65% removes it. Both retain dedicated arrow keys, making them great for productivity.
- 60% & 40% Layouts: Hyper-minimalist boards that remove dedicated arrow keys and F-rows, relying entirely on customized “Fn” layers for navigation.
Comparison Table: Different Types of Mechanical Keyboard Layouts
This table provides a quick overview of the most popular mechanical keyboard layouts to help you compare sizes at a glance
| Layout | Approximate Width | Retains Arrow Keys? | Retains F-Row? |
| 100% (Full Size) | 17 – 18 inches | Yes | Yes |
| 96% (Compact) | 15.5 inches | Yes | Yes |
| 80% (TKL) | 14 inches | Yes | Yes |
| 75% | 12.5 inches | Yes | Yes |
| 65% | 12.5 inches | Yes | No |
| 60% | 11.5 inches | No | No |
| 40% | 9.5 inches | No | No |
Regional Standards and Ergonomic Shapes
Beyond simply cutting down on the number of keys, there are different kinds of keyboard layouts categorized by regional typing standards and structural ergonomics. When you dive deep into the custom hobby, exploring these different kinds of keyboard layouts can dramatically improve your typing health.
1. ANSI vs. ISO Standards When purchasing keycaps or a barebones kit, you must verify the regional layout:
- ANSI: The standard for the United States. It features a wide, rectangular “Enter” key and a wide left “Shift” key.
- ISO: The European standard. It is instantly recognizable by its tall, upside-down L-shaped “Enter” key and a shorter left “Shift” key.
2. Ergonomic and Split Designs Standard rectangular keyboards force users to bend their wrists inward (ulnar deviation). To address this, specialized different mechanical keyboard layouts have emerged:
- Alice / Arisu: These boards split the keys into left and right clusters, angling them slightly outward to match the natural resting angle of human wrists.
- Ortholinear: Unlike traditional keyboards where the rows of keys are staggered diagonally, ortholinear boards arrange keys in a perfect, straight grid to reduce the distance fingers need to travel.
- Fully Split: Keyboards that come in two separate physical halves connected by a cable, allowing the user to place them shoulder-width apart to completely open up the chest.
Now that you have a basic overview of the landscape, let’s dive into an in-depth breakdown of each specific layout to help you find your perfect match.
100% Full Size Mechanical Keyboard (The Desk Behemoth)
Look, I’ve been building boards for over a decade, and I’ll just say it straight: if you’re still rocking a 100% layout for anything other than high-speed data entry, your desk setup is likely an ergonomic disaster. Let’s strip away the marketing hype and talk about what this absolute unit of a board actually does to your workstation.
Physical Dimensions and Key Count
Let’s get the basics out of the way. If you’re a newcomer asking how many keys are on a full size mechanical keyboard, you’re looking at exactly 104 keys for the standard ANSI layout (or 105 for ISO).
To fit all of that, a full size mechanical keyboard demands a sprawling 17.5 to 18 inches of your desk mat. It gives you the alphanumeric cluster, the F-row, the navigation block, and the numpad without forcing you to memorize a single layer shortcut. But that sprawling footprint comes with a massive physical penalty.
Where It Shines & Fails: The “Mouse-to-Chassis” Collision
I’ll be blunt. If your 9-to-5 involves hammering out lines of JavaScript or crunching endless Excel spreadsheets, a mechanical keyboard with numpad is a necessary evil. It shines when your workflow requires rapid, mindless numerical entry.
But for gaming? It’s garbage. The physical desk real estate loss is catastrophic. If you play shooters on a low sensitivity, you have undoubtedly experienced the dreaded “mouse-to-chassis” collision. Your flicks get completely ruined because your mouse slams violently into the right side of the board. You’re sacrificing about 5 inches of prime mouse territory just to harbor a mechanical keyboard with numpad that you probably only use for typing two-factor authentication codes. If you rely heavily on a Numeric Keypad or specific special characters, this is the only layout that guarantees you won’t need to memorize complex keyboard shortcuts.
Sound Profile and Acoustic Tuning
From a builder’s perspective, these behemoths are a nightmare to tune. Because the PCBs and plates are so damn long, they are incredibly prone to case warping. That massive internal volume turns a standard full size mechanical keyboard into a hollow resonance chamber. You get this awful, echoing pinging noise traveling straight through the board with every keystroke.
Most cheap pre-builts use a stiff tray mount, which feels like bottoming out on concrete. If you’re scouring forums asking what is barebones mechanical keyboard full size meant to sound like, the honest answer is “pretty bad”—unless you shell out a premium for a heavy aluminum case with a proper gasket mount. Even then, balancing the acoustic “thock” across 18 inches of a barebones kit is an exercise in pure frustration.
Keycap Compatibility & Maintenance
The one saving grace here is keycap compatibility. Unlike compact 65% boards where you have to hunt down a weird 1.75u right shift or 1u bottom row modifiers, a full size mechanical keyboard sticks strictly to standard unit sizing. You get your standard 6.25u spacebar and 1.25u bottom modifiers. Any base keycap set will fit it.
But don’t celebrate yet; the maintenance is brutal. Lubing 104 individual switches with Krytox 205g0 will steal hours of your weekend. Furthermore, tuning a mechanical keyboard with numpad means dealing with three extra stabilizers (the Numpad Enter, Plus, and Zero keys) that will inevitably rattle and drive you insane.
Who Should Buy a Full-Size Layout?
- Target Audience: Accountants, data entry clerks, and software developers who absolutely refuse to learn secondary layers.
- Avoid If: You game. Seriously. Stop searching for what is barebones mechanical keyboard full size for your gaming rig. Save your shoulders and get a TKL.
Full-Size Keyboard Performance Myths & Essential Mods
Beginners constantly ask how many keys are on a full size mechanical keyboard, expecting the sheer number to somehow equate to better performance. It doesn’t. And don’t get baited by gaming brands pushing an “8000Hz polling rate” on these massive boards. A high polling rate won’t fix the ergonomic disaster of having your arms splayed wide apart. If you absolutely must build one, pack the chassis with high-density Poron foam to kill the case ping, and focus on Holee-modding that 6.25u spacebar wire first.
80% Tenkeyless (TKL) Keyboard Layout: The Ergonomic Gold Standard
I get beginners in my DMs every day asking what does tkl keyboard mean or what is a tenkeyless keyboard. It’s not a cryptic code. It literally means you take a standard board, take a proverbial bandsaw to the right side, and chop off the numpad. That is your standard 80 percent keyboard.
If you ask any veteran builder what the absolute gold standard of the hobby is, we will point to the TKL.
Physical Dimensions and Key Count
By ditching the numpad, an 80 keyboard layout shrinks the physical footprint down to roughly 14 inches. You are left with 87 keys (in standard ANSI). You get the main alphanumeric block, the navigation cluster, dedicated arrow keys, and the F-row.
It is the perfect middle ground. You don’t have to memorize a single “Fn” layer shortcut, but you immediately reclaim massive desk real estate.
Ergonomics and Desk Space Impact
If you want to know what is tkl mechanical keyboard ergonomics in the real world, it’s all about shoulder width alignment.In fact, if you’re looking for the most balanced gaming keyboard layout, dropping those extra inches on the right side brings your mouse hand inward. Your shoulders finally sit flush and natural.
If you are grinding through software development, spending your nights learning JavaScript, or playing low-sensitivity FPS games, an 80 percent keyboard layout is strictly the best choice you can make. You keep your dedicated arrow keys for navigating lines of code and your F-row for debugging, but you stop destroying your rotator cuff reaching for your mouse.
Where does it fail? Nowhere, honestly. Unless your literal job title is “Accountant,” you do not need those extra keys.
Sound Profile and Acoustic Tuning
Acoustically, an 80 mechanical keyboard is where custom builders really get to show off. It is the perfect size for a true gasket mount system. The PCB is wide enough to give you a bouncy, flexible typing feel without the massive, cavernous empty space of a full-size case that causes hollow case ping.
However, be warned about the F-row. If you buy a cheap tray-mounted TKL, you will notice harsh acoustic resonance and a stiff bottom-out feel when hitting the F-keys and the spacebar because of where the standoffs are screwed in. A proper gasket mount isolates the plate and kills that vibration.
Keycap Compatibility: The Easiest Board to Build
This is why I push everyone toward an 80% keyboard. Every single base keycap set on the market is designed to fit this board.
You don’t have to hunt for a weird 1.75u right Shift or a 1u bottom row modifier like you do on compact boards. You use a standard 6.25u spacebar, standard 2.25u and 2.75u Shifts, and standard 1.25u bottom row modifiers. Maintenance is straightforward: pop open your 87 switches, lube the stems with Krytox 205g0, clip and Holee mod your standard stabilizers, and you are done. No headaches. No missing keys.
Ideal Use Cases: Who Should Buy a TKL Layout?
- Target Audience: Gamers, software developers, and literally anyone who wants a clean desk without the steep learning curve of a 60% board.
- Avoid If: You are required to input hundreds of IP addresses or financial data sets a day.
Optimizing an 80% Layout: Essential Mods and Performance Truths
Because the F-row sits isolated at the top of an 80 mechanical keyboard, it can sometimes sound slightly higher pitched or “thinner” than the alphanumeric cluster. Apply two layers of masking tape (the Tape Mod) strictly under the F-row on the back of the PCB. It acts as a high-pass filter and deepens the acoustic signature of those top keys to match the rest of the board. Also, ignore brands pushing a 4000Hz or 8000Hz polling rate on TKLs—a stable 1000Hz PCB with well-lubed switches will out-perform a scratchy “gamer” board every single time.
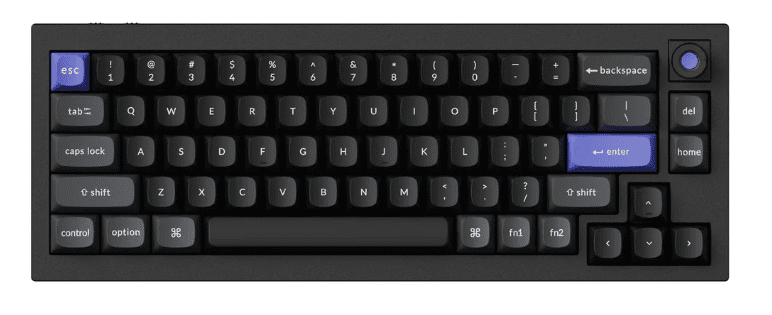
The 75 percent keyboard layout (And exactly how many keys on a 75 keyboard you get)
I’ll just say it: the TKL is great, but the 75 percent keyboard layout is objectively superior for modern desks. It takes everything good about an 80% board, puts it in a vice grip, and crushes out the useless empty plastic.
Every time I post a build online, my inbox gets flooded with the exact same questions from beginners: how many keys are in a 75 keyboard, or how many keys does a 75 keyboard have? Let’s break down the physical reality of this board.
Physical Dimensions and Key Count
If you are trying to figure out how many keys are on a 75 percent keyboard, the answer is typically between 82 and 84 keys. By shaving off the empty space between the arrow keys, the navigation cluster, and the main typing block, a 75 percent mechanical keyboard shrinks your desk footprint down to roughly 12.5 inches.
You keep the F-row. You keep the dedicated arrow keys. You just lose the plastic gaps.
Ergonomics and Desk Space Impact
If you are a software developer grinding through data structures and algorithms, or spending late nights debugging JavaScript, this layout is king. You need the F-row for stepping through code, the arrow keys for navigating IDEs, and the backtick for template literals. The keyboard layout 75 percent footprint gives you all of that while keeping your mouse practically fused to your right hand.
But it fails if you buy the wrong type of 75%. There are two styles: Compact and Exploded. A “Compact” 75% jams every single key together in one massive block. You will constantly hit the wrong keys because your fingers have no physical gaps to reset muscle memory. Always look for an “Exploded” layout (like a Keychron Q1), which adds tiny, physical aluminum gaps around the arrow keys and F-row. It will save your sanity.
Sound Profile and Acoustic Tuning
Acoustically, this is the Holy Grail. Because the PCB is dense but not overly wide, the 75 percent mechanical keyboard is the absolute perfect canvas for a true gasket mount.
You don’t get the hollow, echoing case ping of a full-size, and you don’t get the stiff edges of a TKL. When you type on a well-tuned 75% polycarbonate plate, the entire PCB flexes evenly under your hands. It produces a deep, thocky resonance that is incredibly satisfying.
Keycap Compatibility & The Lubing Grind
Here is the brutal truth about maintenance. When buying parts for a 75 keyboard how many switches do you need to lube? You’re still opening, stem-lubing, and filming 82 to 84 individual switches. I’ve spent countless Friday nights hunched over my desk for three hours, inhaling Krytox 205g0 fumes, dealing with the physical exhaustion of prepping 80+ switches just to get a board ready. It is a grind.
Furthermore, keycap compatibility gets annoying. Because they squeezed the arrows in, your right Shift key is now a weird 1.75u size. The modifiers to the right of your spacebar (Alt, Fn, Ctrl) are shrunken down to 1u squares. If you buy a cheap set of keycaps from Amazon, they will not fit. You must verify the kitting.
Best For: The Modern Developer
- Target Audience: Software developers, video editors, and gamers who demand a high-performance setup without sacrificing the F-row.
- Avoid If: You absolutely cannot handle non-standard keycap sizing.
Optimizing a 75% Layout: VIA Firmware and Key Reprogramming
When customizing a 75 percent keyboard layout, you lose a few navigation keys (like Print Screen or Insert) to make room for a rotary encoder (the volume knob). People constantly ask about a 75 keyboard how many keys can be reprogrammed to fix this. The answer is all of them. Ignore the polling rate marketing. Make sure the board supports QMK/VIA firmware. You can instantly map “Fn + Backspace” to be your Delete key, or “Fn + Up Arrow” to act as Page Up. Relying on layers for those 3 or 4 missing nav keys is how you master this board. To keep your typing speed high and avoid any potential typing injury or Repetitive Strain Injury, consider pairing this board with a proper Palm Rest or ergonomic wrist rest to compensate for the front height.
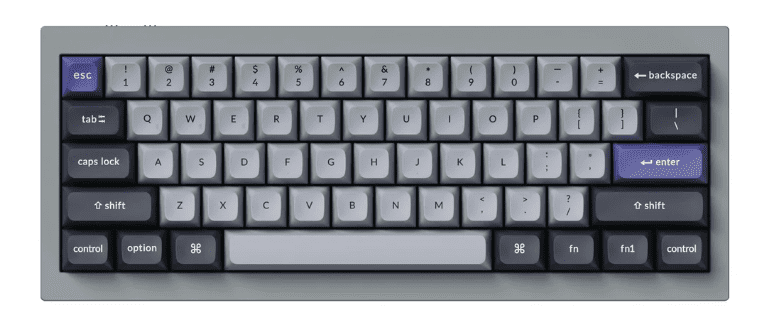
65% Keyboard Layout: The Minimalist’s Choice
If you want a board that looks incredibly sleek on a desk mat but doesn’t completely nuke your ability to edit text, the 65 percent keyboard layout is exactly where you land. You take a 75% board, fire up the metaphorical table saw, and slice the top F-row completely off.
When beginners plan out their builds and ask regarding a 65 percent keyboard how many switches they actually need to buy, the magic number is usually 67 or 68. You are sitting at a compact 12.5 inches wide, but you lose a full inch of vertical height compared to a 75%.
It is the quintessential keyboard 65 percent aesthetic pure alphanumeric core with a tight, dedicated column of navigation keys and arrows on the far right.
Ergonomics and Workflow Impact
Let me establish some trustworthiness right now: losing the physical F-row is a massive pain for a lot of productivity apps. If your daily workflow relies on hitting F5 to refresh, F12 for dev tools, or F2 to rename files, retraining your brain to press “Fn + 5” will frustrate you for weeks.
But the biggest muscle memory retraining nightmare? The tilde (~) and backtick (`) key. On a true keyboard layout 65 percent, that key gets violently merged with the Escape key. If you write any sort of code—especially JavaScript template literals—you will constantly hit “Esc” when you mean to type a backtick. It takes serious mental recalibration to overcome.
Sound Profile and Acoustic Tuning
Because a 65 percent keyboard is so heavily compressed, the acoustic profile is incredibly dense. There is almost zero empty internal case volume, meaning hollow case ping is practically non-existent.
A proper gasket mount in this form factor is a builder’s dream. The flex across the PCB is tight and uniform. Pair it with a polycarbonate plate, and you get an aggressively deep, concentrated “thock” that stiff tray-mounted boards simply cannot physically replicate.
Whether you have hot-swappable sockets or a soldered board, grab a good keycap puller and switch puller; applying proper switch lubrication and adding internal sound dampeners will completely transform your typing experience.
Keycap Compatibility and Maintenance Requirements
Welcome to the 1.75u nightmare. Because the arrow cluster is shoved directly into the main alphanumeric block of the 65 percent keyboard layout, your standard right Shift key gets butchered down to a 1.75u size. You also get three 1u modifiers to the right of the spacebar. If you buy a cheap set of keycaps, they will not fit.
Furthermore, maintenance here is a tedious chore. Tuning 2u stabilizers in that ultra-tight right-hand cluster (Backspace, Enter, and that stubby 1.75u Shift) requires absolute precision. If your stabilizer wire isn’t perfectly balanced, the rattle will resonate through the entire right side of the board. You’ll find yourself pulling switches out and re-applying Krytox 205g0 to your stabilizer housings more times than you’d like to admit just to silence the tick.
Who Should Buy a 65% Layout?
- Target Audience: Writers, hardcore gamers who want maximum mouse space, and minimalists who refuse to give up their arrow keys.
- Avoid If: You are an intensive software developer who refuses to re-map standard IDE shortcuts or rely on an Fn layer for basic debugging.
Optimizing a 65% Layout: QMK Workarounds and Stabilizer Tuning
Don’t let the Escape/Tilde clash ruin your workflow. If your PCB supports QMK/VIA (which it absolutely should; ignore boards screaming about 8000Hz polling rates if they lack VIA compatibility), there is an easy fix. Map the physical top-left key to ‘Escape’ on your base layer, but map ‘Shift + Esc’ to output the Tilde (~). It fixes 90% of the muscle memory issues for coding. And when tuning those cramped 2u stabs, use a syringe to inject a tiny bit of dielectric grease directly onto the wire without desoldering the whole cluster.
60% Keyboard Layout: The Ultra-Compact Gaming Keyboard Layout
Listen, if you are building a 60 percent keyboard layout, you are making a deliberate, aggressive choice. This isn’t a board for casual office work or writing your thesis. You take a 65%, fire up the bandsaw again, and brutally amputate the dedicated arrow keys.
If you are staring at a barebones kit and wondering exactly how many keys does a 60 keyboard have, the answer is a ruthless, unforgiving 61 keys (in standard ANSI). You are left with just the alphanumeric block and your basic modifiers. Nothing else.
Because it is stripped down to the absolute bare minimum, a keyboard 60 percent footprint is barely 11.5 inches wide. It is a tiny, dense brick designed for one specific purpose: dominating desk space.
Ergonomics and Productivity Impact
Let me be bluntly honest: trying to do real productivity work on this layout is an exercise in pure masochism. When beginners realize they can’t quickly navigate a spreadsheet, they panic and ask how many keys does a 60 keyboard have again, assuming they bought a defective board missing its arrows. Nope. Navigating text requires you to hold an “Fn” key while pressing I, J, K, and L. If you are a coder or data analyst, this will severely bottleneck your workflow until you develop cast-iron muscle memory.
Where does it shine? Tournament-level gaming. If you play low-sensitivity tactical shooters like CS2 or Valorant, the 60 percent keyboard layout is a god-tier gaming keyboard layout. You get over a foot of uninterrupted desk space for massive, aggressive mouse swipes. You will never, ever slam your mouse into the side of your keyboard chassis during a flick shot.
Sound Profile and Acoustic Tuning
Acoustically, the 60% scene is a mixed bag heavily burdened by its own history. For years, the standard GH60 tray-mount design dominated this space. If you buy a cheap tray-mounted 60%, it will sound awful. The standoffs are screwed directly into the center of the PCB (right between the G and H keys), meaning the center of the board feels as stiff as concrete and pings loudly, while the edges flex.
To get a good sound out of a keyboard 60 percent build, you must ditch the tray mount. Look for modern cases that utilize a proper silicone gasket mount. Because the PCB is so small and rigid, a gasket mount with a polycarbonate plate will give you a concentrated, aggressive “clack” or “thock” that cuts through the noise of your gaming headset.
Keycap Compatibility and Switch Technology
Here is the one massive upside to this layout: keycap compatibility is absolutely flawless. By ditching the arrow keys, we return to the holy grail of standard sizing. You get a standard 6.25u spacebar, a standard 2.75u right Shift, and standard 1.25u bottom row modifiers. Every base keycap set on the planet will fit this board perfectly. Maintenance is also a breeze—you only have 61 switches to crack open and lube with Krytox 205g0.
But in the modern era, traditional mechanical switches are being phased out in this form factor. The 60% space is currently dominated by Hall Effect magnetic switches. Gamers demand Rapid Trigger functionality, where the switch resets the instant you lift your finger, allowing for perfect counter-strafing.
Best For: The Sweaty Gamer
- Target Audience: Competitive FPS gamers, tournament players, and people with absolutely massive mousepads.
- Avoid If: You edit video, write code, or literally ever use Excel. Stop torturing yourself and buy a 75%.
Optimizing a 60% Layout: Layer Programming and Firmware
Before you buy, ask yourself not just how many keys does a 60 keyboard have, but if you are willing to learn layer programming. For example, the gaming community constantly asks how to screenshot in 60 percent keyboard wooting builds since there is no Print Screen key. The answer is layers. On a Wooting 60HE (or any QMK/VIA compatible board), you map Fn + Enter or Fn + P to trigger your screenshot macro. Don’t rely on software for this; program it directly onto the board’s onboard memory so your layers work even when you plug it into a tournament PC.
The 40 keyboard layout & The ortholinear keyboard
Let’s get something straight: if you are still complaining about losing your dedicated arrow keys or your F-row, close this page. The 40 keyboard layout is not for the faint of heart. It is the absolute bleeding edge of the mechanical keyboard hobby, designed strictly for elitists, touch-typing purists, and people who understand that desk real estate is a premium.
When you dive into this tier, you also encounter the ortholinear keyboard. We are throwing away over a century of typewriter history and rebuilding how your fingers interact with plastic.
Physical Dimensions and Key Count
A standard 40 percent keyboard layout strips away everything but the alphabetical core and a few modifiers. We are talking about chopping off the number row entirely. You are left with roughly 40 to 47 keys squeezed into a physical footprint that barely measures 9 to 9.5 inches wide.
Then we have the grid. A traditional keyboard uses a staggered layout (where the rows are diagonally offset). An ortholinear keyboard aligns the switches in a perfect, straight vertical and horizontal grid. When you combine the two into a 40 percent ortholinear keyboard, you get a microscopic, highly efficient typing machine that fits comfortably inside a jacket pocket.
Ergonomics and Workflow Impact
Why do we subject ourselves to this? Efficiency. On a standard staggered board, reaching for the ‘Y’ or ‘P’ key requires your fingers to travel diagonally across the 19mm standard switch spacing, adding unnecessary millimeters of lateral stretch (often 15mm to 20mm of diagonal travel). A 40 ortholinear keyboard eliminates lateral finger travel almost entirely. Your fingers only move directly up or directly down.
If you take it a step further with a split ortholinear keyboard (like the Corne or the Planck), you can place the two halves shoulder-width apart, completely opening your chest and eliminating ulnar deviation.
Where does it fail? The learning curve is a brick wall. If you are sitting down to learn JavaScript, or grinding your way through data structures and algorithms, trying to type curly braces {}, brackets [], and numbers on a 40 keyboard layout will test your absolute sanity. You are relying completely on holding down layer keys just to type a basic for loop. On these ultra-compact keyboard sizes, your fingers rarely leave the home row, drastically reducing lateral movement. But you absolutely need QMK firmware or similar keyboard firmware to map your missing Function Keys and macro keys.
Sound Profile and Acoustic Tuning
Acoustically, a 40 percent keyboard layout is practically dead—and I mean that as a compliment. Because the case is so incredibly small and the PCB is packed so densely with switches, there is zero internal volume for sound to bounce around. Hollow case ping does not exist here.
However, do not expect a bouncy, flexing typing experience. Finding a true gasket mount in this size is exceptionally rare. Most 40% boards use a top mount or an integrated plate system. It feels stiff, precise, and produces a highly concentrated, sharp “clack” rather than a deep, resonant thock.
Keycap Compatibility: The Ultimate Headache
Welcome to kitting hell. If you thought finding a 1.75u right Shift for a 65% board was annoying, the 40 keyboard layout will make you weep.
Because space is so limited, your spacebar is no longer a standard 6.25u wire. You are often dealing with split spacebars—typically a 2.25u and a 2.75u key, or sometimes just a pair of 1.75u keys. Your bottom row modifiers are entirely 1u or 1.25u blanks. Buying a standard $150 premium GMK base kit won’t cover you; you have to hunt down specific, expensive “40s Kits” just to populate the board.
The only saving grace? Maintenance is incredibly fast. Lubing 40 switches with Krytox 205g0 takes less than an hour.
Best For: The Uncompromising Purist
- Target Audience: Ergonomic purists, touch-typing veterans, and hobbyists who want maximum mouse space and zero finger travel.
- Avoid If: You are a standard gamer, a data entry clerk, or someone who refuses to learn how to program custom firmware.
Optimizing a 40% Layout: Advanced QMK/VIA Layering
If you buy a 40 ortholinear keyboard, ignore the marketing jargon about polling rate. The only thing that matters is QMK/VIA firmware capability. To survive on this layout, you must master the “Tap-Hold” function. For example, program your spacebar so that tapping it registers as a ‘Space’, but holding it down activates ‘Layer 1’. Map your ‘Z’ and ‘/’ keys to act as ‘Shift’ when held, but normal letters when tapped. This dual-purpose layer logic is the only way to effectively use a 40 keyboard layout without running out of physical switches.
Finding Your Endgame: A Strategic Guide to Choosing the Perfect Layout
Listen, after building, tuning, and tearing down hundreds of boards over the last decade, I can tell you the ultimate truth about this hobby, there is no single “perfect” keyboard layout. There is only the right tool for your specific job.
If you take anything away from this guide, let it be this: stop blindly copying your favorite Twitch streamer’s desk setup. A 60% Wooting might look incredibly clean on camera, but if your day job requires rapid data entry or complex IDE debugging, you are going to be absolutely miserable. Your desk footprint, your shoulder ergonomics, and your daily software workflow must dictate your physical layout—not aesthetics.
To save you from wasting hundreds of dollars on a barebones kit you end up hating, here is the veteran’s cheat sheet for picking your endgame:
The Builder’s Layout Cheat Sheet
- For the Spreadsheet Warriors & Accountants: Stick to the 100% Full-Size or the 1800-Compact (96%). Yes, they are a nightmare to tune and suffer from hollow case ping, but your workflow demands that numpad. Endure the ergonomic hit to get your work done.
- For the Software Developers & Hybrid Gamers: The TKL (80%) and the Exploded 75% are your undisputed kings. You reclaim massive mouse space to save your rotator cuff, but you retain the vital F-row and dedicated arrow keys for debugging code. Plus, finding standard keycaps for a TKL will save you massive headaches.
- For the Aesthetes & Writers: The 65% layout. It gives you the minimalist desk presence you crave while keeping the arrow keys. Just prepare your sanity for retraining your muscle memory around that Tilde/Escape key merger.
- For the Tournament-Level FPS Gamers: The 60% is your ultimate gaming keyboard layout. Ditch the arrows. Claim your two feet of mouse space for low-sensitivity flick shots. Let the Hall Effect switches do the work, and accept that your productivity tasks will suffer.
- For the Uncompromising Ergonomic Purists: The 40% and Ortholinear boards. If you are willing to spend weeks mastering QMK/VIA tap-hold layers to eliminate millimeters of finger travel, welcome to the bleeding edge.
Final Thoughts Before You Build
Before you hit checkout on that group-buy case, physically map out your desk. Think about the software you open every single day. Look at the kitting chart to make sure you aren’t going to be stranded without a 1.75u right Shift key.
Mechanical keyboards are meant to be an investment and an extension of your hands. If you are wondering how long does a keyboard lasts, the science shows that a well-maintained custom board can survive for decades. Shrink the board as much as your workflow allows, lube your stabilizers properly, get your mouse closer to your center of gravity, and actually enjoy the typing experience you built.