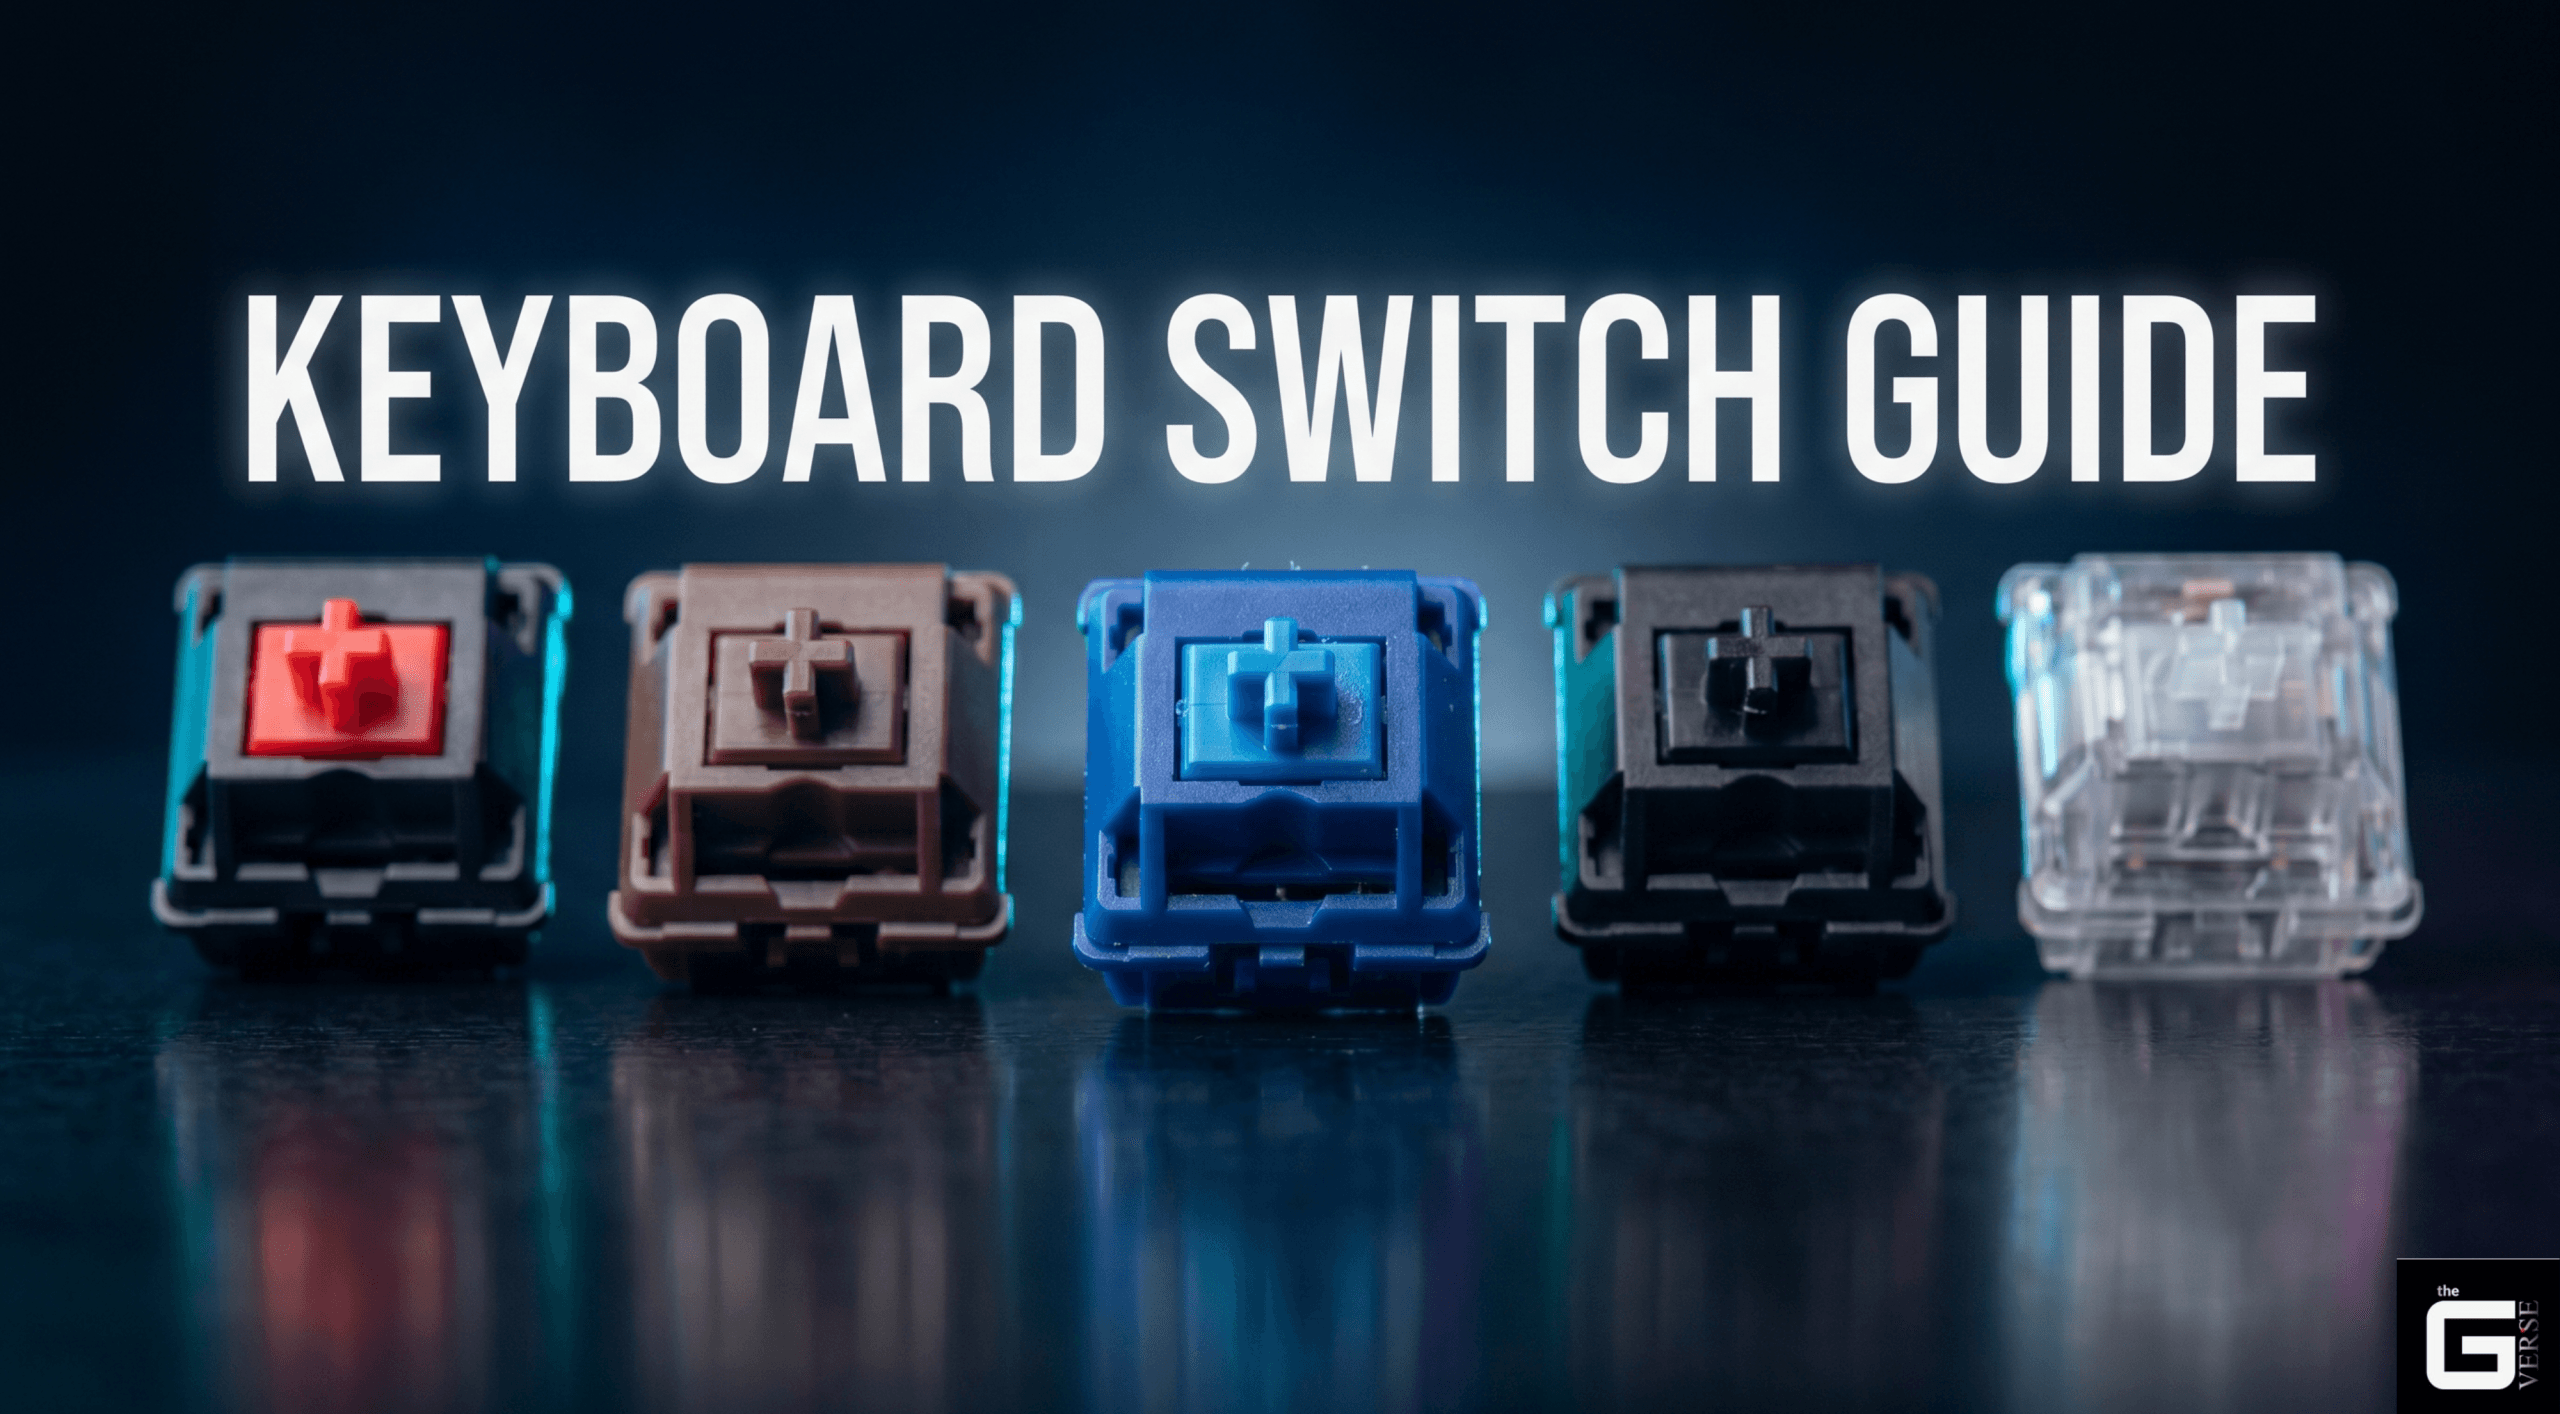
Keyboard Switch Guide: Mechanical vs Optical vs Hall Effect
Picking the right keyboard switch comes down to understanding a few core engineering decisions: how the switch physically registers a keypress, what materials it’s made from, and how its internal geometry shapes both feel and sound. This comprehensive keyboard switch guide breaks down mechanical, optical, and Hall Effect switches from the ground up, so you can actually understand what you’re buying instead of just picking a color.
Quick Answer: A mechanical keyboard switch is an individual, self-contained input device that uses a physical spring and metal contacts to register each keypress. Optical switches replace those metal contacts with a beam of light, and Hall Effect switches use a magnet and sensor instead of either; both newer designs avoid the physical wear that eventually affects mechanical contacts. Choosing the right switch comes down to balancing travel distance, actuation force, housing material, and (for competitive use) firmware-level response tuning.
What Is a Keyboard Switch, and What Makes One “Mechanical”?
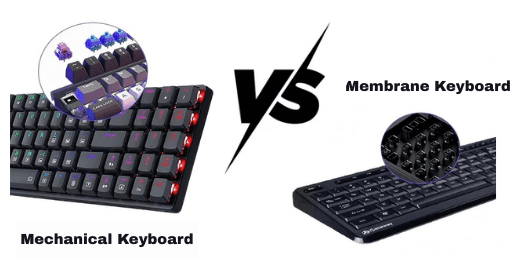
At its core, a keyboard switch is an independent, self-contained actuator that opens or closes a single electrical circuit. That’s a fundamentally different design from a standard membrane keyboard, where every key shares one continuous sheet of rubber dome material underneath the keys.
That shared rubber sheet is also the membrane keyboard’s biggest weakness. As the rubber compresses over thousands of presses, it gradually loses elasticity and stiffens, which changes how every key feels over time, and because it’s one continuous sheet, that degradation happens everywhere at once, not just on the keys you use most.
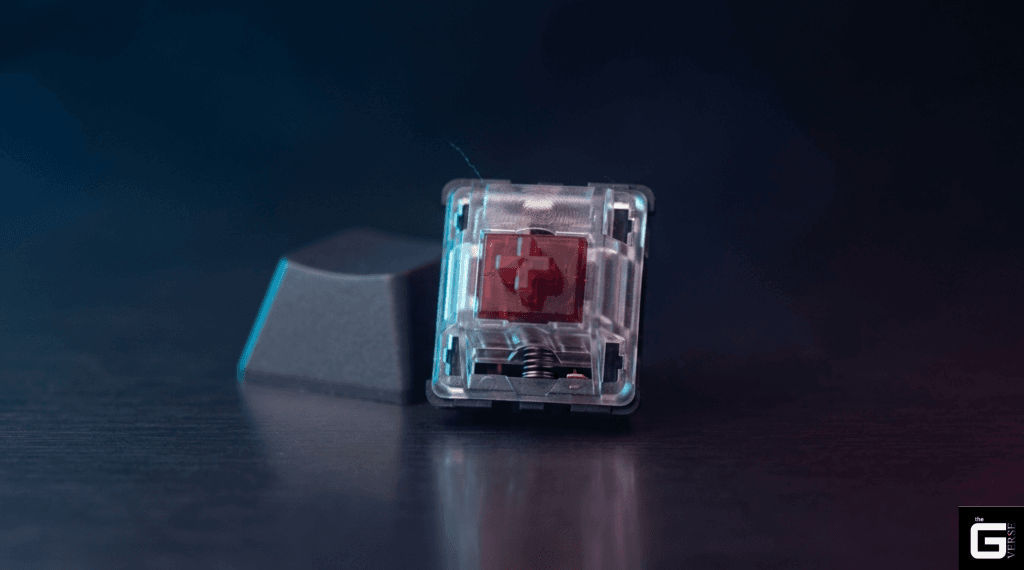
Mechanical switches solve this by housing each key’s moving parts in its own individual casing, built around a steel coil spring and a set of metal contacts. That isolation is also why mechanical switches last so much longer: where rubber dome keyboards typically start showing physical wear somewhere in the 5–10 million keystroke range, mechanical switches are commonly rated for 50 million keystrokes or more, with many premium switches rated well past 100 million.
There’s also a practical repair advantage. A standard membrane keyboard routes everything through printed silver-ink traces, and if even one trace corrodes (commonly from a spill), an entire row or column of keys can stop working, and the only fix is replacing the whole membrane sheet. Mechanical keyboards don’t have that single point of failure. Each switch is independent, so a single worn-out or damaged switch can be desoldered or hot-swapped out in seconds without touching anything else on the board.
Research Insight: Durability testing generally shows that membrane keyboards’ rubber dome components begin showing measurable wear somewhere around the 10-million-actuation mark, as the material gradually hardens and loses elasticity. Mechanical switches commonly exceed 50–100 million cycles thanks to self-lubricating engineering plastics and corrosion-resistant gold-plated contacts that don’t degrade the way membrane traces do. Reference: [1], [2]
The Anatomy of a Mechanical Switch
Every mechanical switch is built from the same basic set of parts, stacked together in a precise sequence:
The keycap is the plastic piece your finger actually touches, usually molded from ABS or PBT plastic, and available in different shapes depending on the keycap profile (Cherry, OEM, SA, and so on).
The stem sits underneath the keycap and is the part that actually moves. As you press down, the stem travels downward inside the housing and eventually triggers the internal contacts.
The top housing is the upper half of the switch shell. It holds the stem in place along guide rails and sets the upper limit of the stem’s travel.
The coil spring is what pushes back against your finger and snaps the stem back up once you release the key.
The contact leaves are a pair of metal leaves (usually copper or phosphor bronze, often finished with a gold crosspoint contact at the point where they actually touch) that physically touch to complete the circuit when the stem pushes them together.
The bottom housing is the base that holds everything together: the contact leaves, the spring, and the mounting points that snap the switch into the keyboard’s plate.
Above all of this sits the mounting plate, a rigid sheet (usually metal, sometimes plastic or fiberglass) that holds all the switches in alignment and helps absorb some of the vibration from bottoming out. Below the plate is the PCB, the circuit board itself, which carries the copper traces, the diodes that prevent ghosting, and the keyboard’s microcontroller.

That microcontroller doesn’t wire every single key to its own dedicated pin, which would require far too many pins on the chip. Instead, switches are arranged in a grid of rows and columns, and the microcontroller rapidly checks which row-and-column combinations are completing a circuit at any given moment. To prevent two simultaneous keypresses from accidentally creating a false third connection (called ghosting), each switch is paired with a small diode that only lets current flow in one direction. This is also what makes full N-Key Rollover (NKRO) possible, the ability for the keyboard to register every key you’re pressing at once, no matter how many.
It’s worth noting that “mechanical” isn’t one single fixed design either. Older Alps switches, for instance, used a different internal leaf-and-stem layout than the MX-style switches that dominate the market today, and modern hybrid designs like Razer’s Mecha-Membrane or Logitech’s Romer-G switch blend mechanical-style actuation with elements borrowed from membrane construction. For most buyers, standard MX-compatible switches remain the safest starting point simply because of how much keycap and switch compatibility exists around that format.
Membrane vs. Mechanical: The Real Difference
| Membrane Keyboard | Mechanical Switch | |
| How it registers a press | A rubber dome collapses, pressing a conductive pad onto the circuit | A moving stem pushes two metal contacts together |
| Spring/return mechanism | A rubber dome sheet | A steel coil spring |
| Contact material | Conductive ink on a plastic membrane | Gold-plated metal alloy leaves |
| Typical lifespan | 5–10 million keystrokes | 50–100+ million keystrokes |
| Feel over time | Degrades as the rubber stiffens | Stays consistent for the switch’s whole life |
| Repairability | Not repairable — requires replacing the whole sheet | Fully modular; individual switches can be swapped |
| Key rollover | Limited, often only 2–6 keys at once | Full NKRO support |
Stems, Housings, and Why Materials Matter
A switch’s feel and sound come down to manufacturing tolerances and the specific plastics used in its housing and stem. The basic mechanics: as you press a key, the molded rails on the sides of the stem slide down channels inside the bottom housing. If those rails fit too loosely, the stem can tilt slightly, which shows up as wobble in the keycap. If they fit too tightly, the switch can bind or feel scratchy during off-center presses. Getting that balance right is most of what separates a smooth, well-engineered switch from a cheap, scratchy one. It’s also why some enthusiasts swap in aftermarket stems on otherwise stock switches. A tighter or differently-shaped stem can change the wobble and acoustic profile without replacing the whole switch.
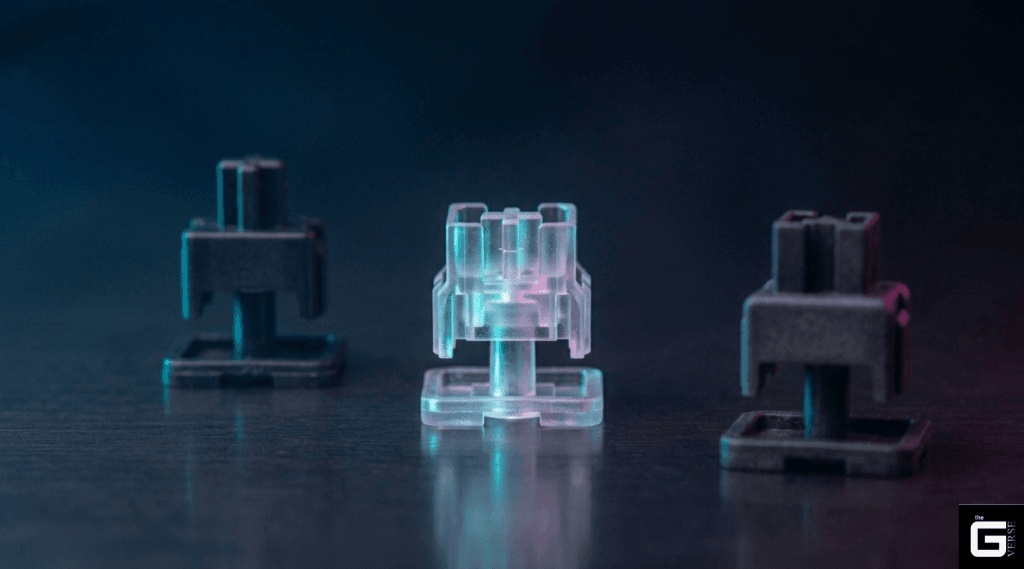
Stem Designs: From Cross Stems to Box Stems
Standard cross stems use a cruciform-shaped post and have been the default design since the earliest mechanical switches. They’re compatible with the widest range of aftermarket keycaps, but because the keycap’s weight rests on a relatively narrow post, they’re somewhat more prone to slight side-to-side wobble.
Box stems wrap that same cross-shaped post in a surrounding wall, so the stem makes contact with the housing across a much larger surface area. That extra contact reduces wobble noticeably, and the enclosed design also helps keep dust and moisture out — some box-stem switches even carry an IP54 ingress rating as a result.
Low-profile stems are shorter than standard stems, cutting total travel down to roughly 2–3mm instead of the usual 4mm. They require their own dedicated low-profile keycaps and PCBs, and they’re mainly used in slim, compact keyboards where a quick, shallow bottom-out is the goal.
Dustproof stems keep the standard cross shape but add partial side walls for extra lateral support and some protection against debris, without going as far as a fully enclosed box design.
Nylon vs. Polycarbonate vs. POM: What the Plastic Actually Does
The plastic a switch is molded from has a real, noticeable effect on both feel and sound.
POM (Polyoxymethylene) is a hard, low-friction plastic almost universally used for stems, since it glides smoothly against the housing with very little resistance. It also has a useful self-lubricating property — as it wears slightly over time, it sheds microscopic particles that actually help smooth out the sliding surfaces further.
Nylon absorbs sound rather than reflecting it, which is why nylon housings tend to produce that deep, muted sound enthusiasts call a “thock.”
Polycarbonate does the opposite; it’s a harder, glassier plastic that reflects sound rather than absorbing it, producing the sharper, higher-pitched “clack” sound. It’s also commonly used for clear top housings, since it lets RGB lighting shine through clearly.
POK (Polyketone) is a newer alternative to POM, with an even lower friction coefficient and better resistance to the slightly gritty feel that can develop in unlubricated switches over time.
Understanding Switch Colors: The Force-Travel Curve
Every switch’s feel can be mapped onto a force-travel curve, basically a graph of how much finger pressure is needed at each point in the keypress. Understanding this curve is the real key to understanding what different switch “colors” actually mean.
A standard switch has about 4mm of total travel, with the contact point (where the circuit actually closes) sitting around the 2mm mark. Manufacturers tweak these numbers to create different switch categories: “speed” switches shorten that activation point to roughly 1.1–1.2mm to reduce input latency for gaming, while some heavier linear switches shorten total travel to around 3.2–3.6mm for a firmer, more solid-feeling bottom-out.
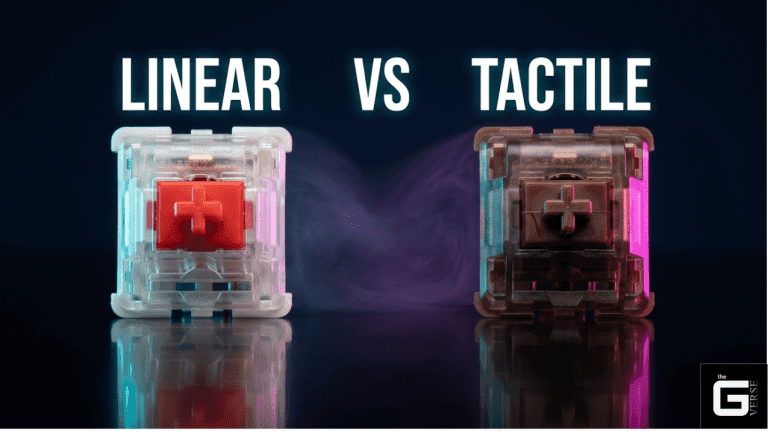
Linear vs. Tactile vs. Clicky
| Linear (e.g. Cherry MX Red) | Tactile (e.g. Cherry MX Brown) | Clicky (e.g. Cherry MX Blue) | |
| Feel | Smooth all the way down, no bump | A noticeable bump partway down | A bump plus an audible click |
| Feedback | None besides spring resistance | Physical bump at the actuation point | Physical bump and a sharp click sound |
| Sound | Quiet, depends mostly on bottom-out | Moderate — no click, but some impact noise | Loud and sharp |
| Best for | Gaming, fast typing, quiet spaces | General typing, coding, office use | Typists who like audible confirmation |
Cherry’s own lineup gives a good sense of how much variety exists within just one switch family. Cherry MX Black switches are a heavier linear option favored by people who want extra resistance to avoid accidental presses, while Cherry MX Green switches are essentially a Blue with a stiffer spring, giving a heavier, more deliberate click. Cherry MX Silent Red dampens the linear stroke with internal rubber pads for quieter typing, and Cherry MX Low Profile switches shrink the whole travel distance for slim keyboard designs. Speed-oriented options like Cherry MX Speed Silver and Kailh Speed switches shorten the actuation point specifically to shave milliseconds off response time for gaming. Other brands — Razer’s Green, Orange, and Yellow switches, or Kailh’s own Red, Brown, and Blue lines generally mirror this same red/brown/blue logic even when the naming differs slightly between manufacturers.
You’ll also see switches described informally by their sound rather than their official name or color. “Thocky” switches lean on nylon housings and heavier springs to produce that deep, rounded sound; “clacky” switches use harder polycarbonate to produce a sharper, higher-pitched impact; and “creamy” switches (a nod to Gateron’s cream-colored housing on some of its smoother linears) describe a particularly buttery, friction-free feel rather than a specific sound at all.
How Clicky Switches Actually Make That Sound
There are two completely different mechanisms manufacturers use to create that signature click, and they sound noticeably different from each other.
Click jacket switches use a two-piece stem: the main slider moves down and drags a separate floating “jacket” piece along with it. As the stem passes the activation point, tension in the contact leaf releases the jacket, which snaps down and hits the bottom housing — that’s the click you hear. Because the jacket gets dragged back up more slowly on the return stroke, the upstroke sound is noticeably softer and mushier than the downstroke click.
Clickbar switches (used in switches like Kailh’s Box White and Jade lines) take a different approach entirely. A thin metal wire sits horizontally inside the housing, and a ramp on the descending stem pushes it outward as you press. Once the stem clears the ramp, the wire snaps back and strikes the housing wall, producing a sharper, more metallic click than the jacket design and noticeably louder. Because the ramp is symmetrical, this design clicks on both the downstroke and the upstroke, giving you two distinct, evenly matched clicks per keypress rather than one loud click and one soft one.
Contact Bounce and Debounce: How Firmware Cleans Up a Messy Signal
A mechanical switch’s job sounds simple: close a circuit when pressed, but the actual electrical signal it produces is messier than you’d expect. When the metal contact leaves touch, they don’t seal cleanly on the first contact. They physically bounce and vibrate against each other several times in a fraction of a second before settling into a stable connection. This is called contact bounce, or key chatter.
To a microcontroller scanning the keyboard matrix thousands of times per second, that bounce looks like a rapid flickering of on/off signals, which, left unfiltered, would register as several duplicate keystrokes from one single press. That’s why every keyboard’s firmware includes a debounce algorithm to filter out the noise and isolate the one real keypress.
Research Insight: Contact bounce happens because the metal alloy in the contact leaves has natural elasticity when struck together at speed, they briefly oscillate before settling. Keyboard firmware has to actively filter out this oscillation in software rather than relying on the hardware alone to produce a clean signal. Reference: [1]
Switch Electrical Ratings
Every switch carries a few standard electrical ratings on its datasheet:
- Maximum operating voltage — typically 12V DC for standard keyboard logic circuits, defining the point at which current could arc across open contacts before the switch physically closes.
- Maximum operating current — typically around 10mA, which sets the thermal limit for the thin contact leaves; exceeding it risks heat damage to the contact points.
- Insulation resistance — typically rated at a high minimum (in the hundreds of megaohms), reflecting how well the housing plastic resists unwanted current leakage.
- Dielectric strength — the housing’s ability to handle brief voltage spikes without shorting, usually tested at a few hundred volts AC.
Premium switches use gold-plated contacts specifically because gold doesn’t oxidize the way copper or silver does, which keeps resistance low and the signal clean over the switch’s entire lifespan.
Two Approaches to Debouncing
Eager debouncing reports the keypress to your computer at the very first contact, then ignores any further signal from that key for a short window (typically a few milliseconds) to filter out the bounce. This gives the lowest possible input latency, which is why it’s the preferred approach for competitive gaming.
Defer debouncing waits until the signal has fully settled and stayed stable before reporting anything. If the signal bounces during that wait window, the timer resets and starts over. This is slightly slower but tends to produce a more reliably clean signal.
Once a keypress is confirmed, the microcontroller packages it into a standard HID report and sends it over USB to your computer.
Troubleshooting Hot-Swap Compatibility
One of the most common issues builders run into with budget hot-swap keyboards is pin mismatch. Standard MX-style switches (Cherry, Gateron, Kailh, and similar) use metal pins roughly 0.8mm wide. Some budget hot-swap sockets, however, are built for thinner pins, often only accepting something closer to 0.4–0.5mm, and forcing a standard-width pin into one of these sockets risks crushing the socket, bending the pin, or breaking the solder joint holding the socket to the board.
If you run into this:
- Check your switch’s pin width first. Most standard switches use the wider 0.8mm pin. Also, confirm whether your board supports 3-pin or 5-pin switches. Older boards often only support 3-pin switches, so the extra stabilization pins on a 5-pin switch will need to be clipped off.
- File the pins down if needed. If your board uses thin-pin sockets, a fine needle file or flush cutters can carefully narrow the wider metal pin to the socket’s expected width.
- Replace the socket if filing isn’t practical. Desoldering the existing socket and replacing it with a standard 5-pin-compatible hot-swap socket is a more permanent fix if you’re doing this across an entire board.
- Transplant internals as a last resort. If the PCB itself is too delicate to resolder, you can open both switches with a switch opener tool and move the stem and spring from your preferred switch into a housing that’s already compatible with your board’s sockets.
Most of this troubleshooting assumes a plate-mount board, where switches snap into a rigid mounting plate above the PCB rather than relying solely on PCB mount legs (the small plastic pegs on 5-pin switches that hold the switch steady against the board itself). A proper metal keycap-and-switch puller, rather than something improvised like an IC puller meant for desoldering chips, makes the whole process noticeably safer for both the switch pins and the PCB pads. It’s also worth factoring in keycap material at this stage: PBT keycaps resist shine and wear better over years of use than ABS, though that’s a keycap decision rather than a switch one.
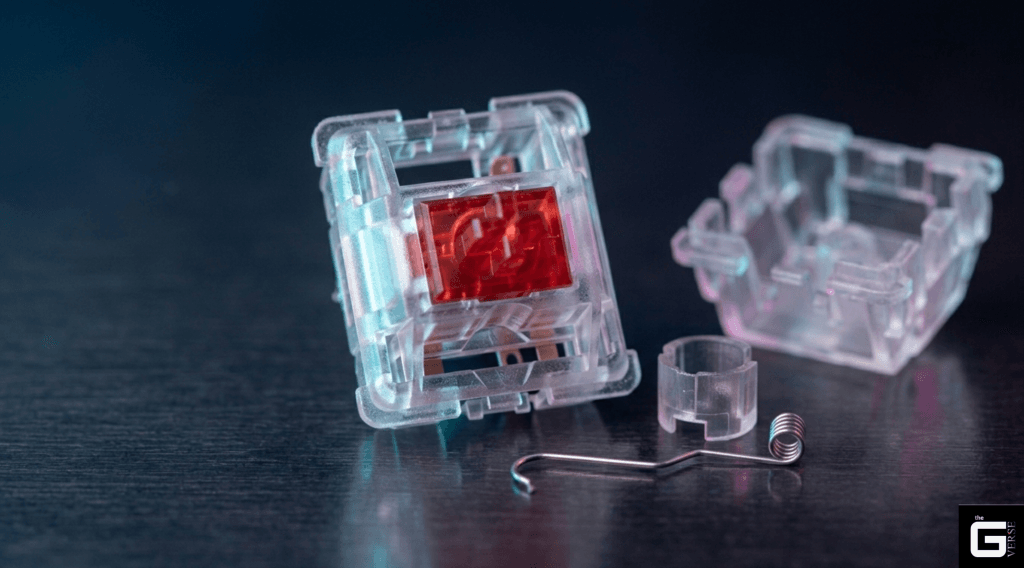
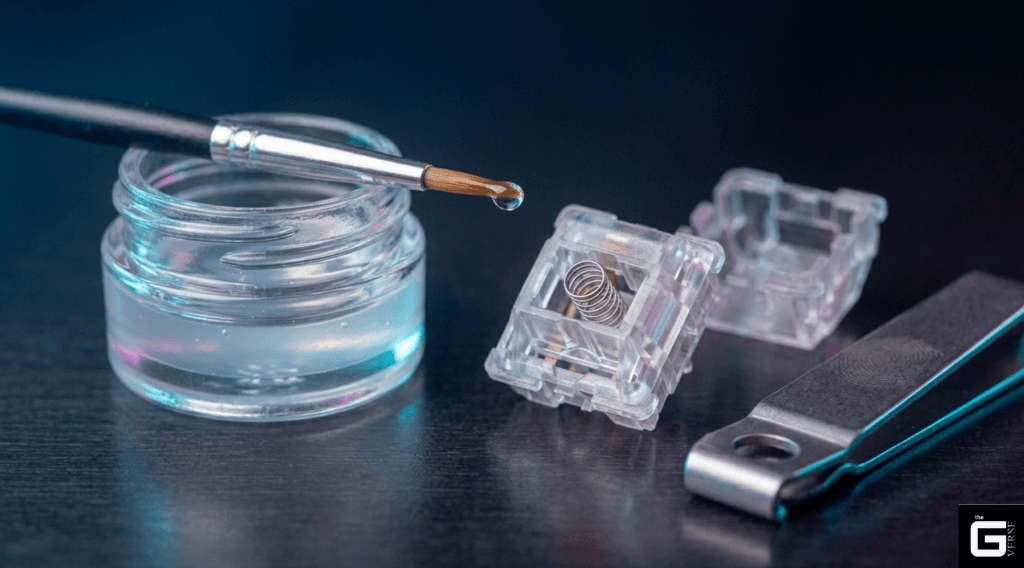
Lubing Switches: Why and How
A large part of what separates a smooth, premium-feeling switch from a scratchy budget one comes down to lubrication. Factory-lubed switches (most modern Cherry, Gateron, and Kailh lines) come pre-treated, but enthusiasts often relube switches by hand for an even smoother result.
The process typically involves opening each switch with a switch opener, applying a thin layer of lubricant (something like Krytox 205g0 grease is a common choice) to the stem rails and spring with a fine-tip brush, then reassembling. Some builders also add a small rubber O-ring under the keycap to soften the top-out sound slightly. None of this changes how the switch electrically registers a keypress; it’s purely about feel and noise.
Speaking of noise: if you’re trying to judge how loud a switch actually is before buying, be cautious of sound tests you find online. The recording setup, the case material, any sound-dampening foam inside the keyboard, a desk mat underneath it, and even the room’s general sound dampening can all shift how a switch sounds in a video compared to how it’ll sound on your own desk.
The Spring Hysteresis Myth
A common claim in keyboard enthusiast communities is that the difference in force between pressing a key down and releasing it (called hysteresis) comes mainly from energy loss in the steel spring itself. That’s largely a myth. High-quality spring steel behaves close to perfectly elastically within its normal range of compression; the spring itself contributes only a small fraction of that force gap.
The much larger factor is friction: the stem sliding against the housing rails on the way down and back up, plus the resistance from whatever lubricant is applied to those surfaces. Switching to a lower-friction stem material like POM or POK, or applying a lighter lubricant, measurably reduces that friction and tends to produce a snappier, more responsive return stroke — meaning the stem reaches its reset point sooner after you let off the key.
A precision-wound coil spring also helps here. Cheaper, inconsistent springs can introduce a faint metallic rattle or “spring noise” sometimes called spring ping as the coils vibrate slightly during travel. Tighter manufacturing tolerances on the spring itself, combined with a thin coat of lubricant, are usually enough to eliminate that rattle entirely.
Research Insight: Mechanical testing generally attributes only a small portion of a switch’s hysteresis gap to the spring’s own elastic properties. The large majority comes from sliding friction between the stem and housing, along with whatever lubricant is used which is why switch lubrication has such a noticeable effect on how “snappy” a switch feels on the return stroke. Reference [1]
Choosing Switches for Gaming, Coding, or Shared Spaces
For competitive gaming, response speed and consistency matter more than anything else. This is the main reason the market has shifted toward optical and Hall Effect (magnetic) switches for high-end gaming keyboards.
Optical switches register a keypress by interrupting a beam of infrared light rather than relying on physical metal contacts touching, which means there’s no contact wear at all over the switch’s life. Hall Effect switches go a step further, using a magnet in the stem and a sensor on the PCB that detects the magnet’s position directly, since the input is based on actual position rather than a simple on/off contact, these switches support features like Rapid Trigger, where the key resets the instant your finger starts lifting rather than waiting for it to fully reset to the top.
For long coding sessions or general productivity work, traditional mechanical switches remain a popular choice for their tactile feedback and wide variety of feel options. If you’re typing in a shared office or open workspace, silent switches that use small rubber or foam dampeners along the stem are worth considering specifically to cut down on both the bottom-out and top-out noise that bothers people nearby.
A Quick Comparison of Popular Switch Types
| Switch | Category | Stem Material | Actuation Force | Sound Profile |
| Gateron Oil King | Heavy linear | POM | ~55g | Deep, muted “thock” |
| Cherry MX2A Red | Light linear | POM | ~45g | Clean, classic, medium-deep |
| HMX Macchiato | High-fidelity linear | POK | ~42g | Bright, sharp “clack” |
| HMX Blue Topaz | Ultra-light linear | POM alloy | ~40g | Crisp, light “clack” |
| Hall Effect / magnetic switches | Analog, contactless | Varies by brand | Varies by model | Depends on housing — no click mechanism by default |
This last category covers a genuinely different switch technology rather than just another variation on the same mechanical theme. The difference matters most for competitive gaming, which is covered in more detail below.
FAQ
Are keyboard switches universal? Mostly, but not entirely. Standard mechanical switches share the same cross-shaped MX footprint, so they’re interchangeable across most mechanical keyboard PCBs. They’re not compatible, however, with boards built specifically for optical switches or Hall Effect (magnetic) switches, since those use entirely different sensing methods.
What does a “yellow switch” usually mean? This almost always refers to Gateron’s Yellow switch line — a popular budget-friendly linear switch known for a smooth, progressive feel right out of the box thanks to good factory lubrication and tight manufacturing tolerances.
How do I swap switches on a hot-swap keyboard? Unplug the keyboard first. Use a keycap puller to remove the keycap, then a switch puller to grip the small tabs at the top and bottom of the switch housing and pull it straight up. Before installing a replacement, make sure its pins are perfectly straight, then line them up with the socket holes and press the switch straight down until it clicks into place.
What do the voltage and current ratings on a switch datasheet mean? These define the electrical limits the switch is designed to handle: the maximum voltage at which contacts could arc, and the maximum current at which the contact leaves, risking heat damage. They’re mainly relevant to manufacturers and modders, not day-to-day typing.
The Bottom Line
The switch choice comes down to a handful of real, measurable factors: stem geometry, housing material, spring weight, and, if you’re picking between mechanical, optical, or Hall Effect, how the switch actually senses your keypress. None of this is just marketing color-coding. A well-matched switch, properly lubricated, with housing materials suited to the sound profile you want, makes a genuinely noticeable difference over hours of daily typing.
For most people, a quality linear or tactile mechanical switch is still the right call, that’s where most of the keycap and modding ecosystem lives, and it covers the vast majority of use cases well. If you’re specifically chasing the lowest possible input latency for competitive gaming, Hall Effect switches with Rapid Trigger support are worth the extra cost. Either way, the switch is the part of your keyboard you interact with the most, so it’s worth understanding what you’re actually buying.